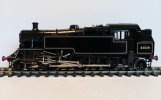
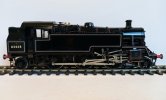
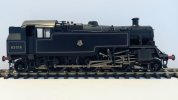
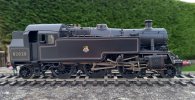
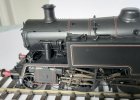
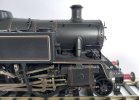
Transport Age (Scorpio) 7mm BR Standard 3MT tank

P A D

Western Thunderer
Thanks for all the likes and comments gents.

Hi Adrian,
As you correctly point out, the reverse curves at the bottom of the tanks are incorrect. In fact they are straight! Unfortunately, nothing I can do about that so I've had to compromise for now. It may be that I or my brother have some suitable curved spares somewhere, but I need to find them. If so I'll rectify it before varnishing. The lack of spare lengths of straight tank lining is also a fault with this set. If you are slightly off with the marking out and end up with a gap, there's no spares to fill in. It then takes a lot of "jiggery pokery" moving things to put it right. Still, the end result is much better than I could achieve with any of the ruling pens and spring bow pens in my drawing instruments collection, so I'll live with it.

These days a better option is to buy the rtr Lionheart offer, but that would take all the fun out of it and the satisfaction of building a much better model than the kit was designed to be. For me it has always been about building locomotives not running them, so the plethora of excellent rtr models don't interest me.

Cheers,
Peter
 

P A D

Western Thunderer
Thanks Tony.

I had to take off the centre part of the roof to facilitate drilling holes to fit the slacking pipes so I took the opportunity to take an image of the cab interior.
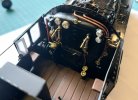
20250422_134428.jpg

Here's the water sieve made from styrene rod and card, with copper feedpipe and mounting pin.
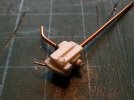
20250422_125959.jpg

After painting ready for fitting with the mounting pin cut to size. I made it overlong to make it easy to hold for painting.
20250422_151042.jpg

Here the sieve has been mounted on the underside of the tank.
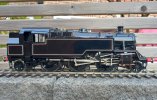
20250422_164357.jpg

This image shows the slacking pipe on the rear of the cab and the proximity of the sieve to the rear coupling rod at the top of the stroke. As well as prototype images of the real thing, I measured the sieve on my MOK standard 4 tank to get the dimentions. It lacked clearance when trial fitted so I had to slim it down a bit with the file, but it passes muster.
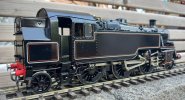
20250422_164420.jpg

After having spent time fitting the speedometer, I couldn't find any evidence that my chosen prototype (82028), one of four allocated to the NE region when new, were speedo fitted in the early 50s, so I've removed it. The marks on the rear bunker panel is just residue from the lining adhesive that will be cleaned of before varnishing.
20250422_164115.jpg

My brother dropped off the spare Fox lining transfers tonight so I will fill in the missing areas on the drop plates. There are some curves as well so hopefully I can improve the reverse curves at the bottom of the tanks. This comparison with an Internet image of the excellent Lionheart model shows what a big difference it will make if I can correct it.
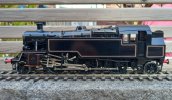
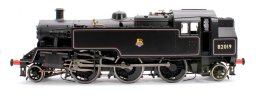
20250422_164046.jpg
IMG_3932_98cf3a53-4233-4c94-a241-b41182fc26de.jpg
No. 19 was from one of the earlier batches fitted with fluted coupling rods

Cheers,
Peter
 

P A D

Western Thunderer
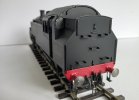
I've filled in the "short falls" in the hanging plate lining and modified the reverse curves at the bottom of the tanks. The latter is not 100% correct but is the best I could achieve with what spare lining was available. I also added the numbers to the bunker sides. I've ordered some mid sized early BR emblems from Fox and a set of etched plates from Diane Carney, so things are now on hold until they arrive in the post.
20250423_195115.jpg

20250423_194947.jpg

Cheers,
Peter
 

P A D

Western Thunderer
Top marks to Fox. I ordered the BR emblems yesterday and they arrived today. I added the emblems, masked off the glazing then varnished/weathered the loco.

20250424_190820.jpg
20250424_190128.jpg

20250424_190222.jpg

20250424_191134.jpg

I painted the lagging on the pipes running along the top of the tanks on the right hand side before varnishing.
20250424_191236.jpg

I just need the etched plates now from Diane Carney to finish it off.

Cheers,
Peter
 

P A D

Western Thunderer
I had to do some back tracking today on the livery. After some correspondence with Roger Scanlon where he made refference to the size of the numerals on the bunker, I took a look at the various prototype photos in books etc and realised that the numerals I'd used were too small! BUGGER! :headbang:

Fortunately, the Tamiya varnish and acrylic paints I used were easily removed with Tamiya thinners. I then carefully scraped off the small numbers with a cocktail stick and replaced them with the correct size. I then revarnished/weathered the cleaned area to blend it in. A cardboard mask was used to prevent overspray and avoid a visible ridge that would have occurred with masking tape. The fluff on the zero was removed before spraying.
20250425_194429.jpg

I dropped the pressure on the airbrush to 10psi and applied several light coats to avoid over doing it.
20250425_195035.jpg

20250425_195532.jpg

I probably overdid it a little on this side but you can't see both sides at the same time so I'll live with it.
20250425_195714.jpg

I have some Clasp Decals shed code plates so I added this until I have the etched ones from Diane Carney.
20250425_112818.jpg

And some close ups of the details.
20250425_133407.jpg


20250425_132926.jpg


20250425_133258.jpg

20250425_132815.jpg


20250425_114231.jpg

This rear end view was taken before I replaced the numerals.
20250425_133216.jpg

Cheers,
Peter
 

P A D

Western Thunderer
Thank you Dave and Mark.

Mark,
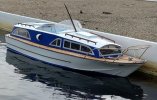
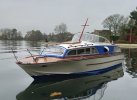
Here's an image of the Huntsman on the water. It's 1:11 scale so about 34 inches long. I bought it second hand and upgraded it with more detail, new motor and electronics, plus a complete respray. It looks good in the water and goes really well.
20240921_095533.jpg

I also have this 1:8 scale (47 inches long) version. This looks and goes even better than the small one. Again, purchased second hand and upgraded. Looks great plowing through the waves in choppy water.
20241109_130411.jpg

The prop shaft set up on the small one is at too steep an angle so the water thrust from the prop passes under the rudder. As a result the turning circle is quite wide and it's less maneuverable at slow speeds. The big one on the other hand is better set up with a shallower prop shaft angle which thrusts the water directly at the rudder and as such, it will turn on a sixpence. They were both built from kits with the small one having a fibre glass hull, whereas the big one is all wood, so would have been a more difficult build.

Nobody make a kit for the 34 inch any more but the 47 inch is available from SLEC. Ready built models of pop up quite frequently on Ebay.

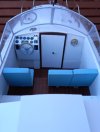
This is the cockpit of the 34.
20240829_175502.jpg

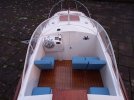
And the 47
20241008_183334.jpg

Cheers,
Peter
 
Top