Boomers Wood

Steve Cook

Flying Squad
Have you cleaned the upper inside edges, i.e. the inner face of the rail head, where the flanges can rub? It is usually worth doing this extra bit.
Er, no - hadn't thought about it to be honest. Now I have thought about it :) I'm going to leave it in place to see what witness marks are left from running the stock - if it causes problems I'll clean it off, but if it doesn't it can stay. Mind you, there is the odd bit where it has come off from using celulose thinners to clean the tops.....
 

Steve Cook

Flying Squad
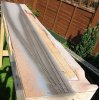
Back in the great outdoors again, although progress is fairly slow as I'm gradually building up layers of plaster to shape the ground at the rear of the layout. Having had problems in the past with plaster cracking (despite a healthy addition of pva), this time around its being done in thin layers which offer a bit more control and dry a bit quicker. The fiddle yard board is done apart from checking to see how well it corresponds to the station board, and I managed to keep the point rodding free from plaster which is a bonus :)

Plaster4.JPG

Once the plaster has dried a bit more on the station board I can trim the scenery which the platform will sit against and then glue the platform into place - the last coat of plaster will then blend the platform into the surroundings.

Plaster3.JPG

Steve
 
S

Simon Dunkley

Guest
Er, no - hadn't thought about it to be honest. Now I have thought about it :) I'm going to leave it in place to see what witness marks are left from running the stock - if it causes problems I'll clean it off, but if it doesn't it can stay. Mind you, there is the odd bit where it has come off from using celulose thinners to clean the tops.....
Well, after my experiences modelling breaking things yesterday, I wouldn't listen to anything I say anyway! :headbang:
 

Steve Cook

Flying Squad
Well, after my experiences modelling breaking things yesterday, I wouldn't listen to anything I say anyway! :headbang:
Bugger :( Hope whatever broke is recoverable.

Platform glued in place now - 'if in doubt, get the sockets out' :D

Station Platform in place.JPG

Time for a splash of paint on the ground frame now and a bit of 16mm modelling whilst the glue / plaster dries.

Steve
 
S

Simon Dunkley

Guest
Bugger :( Hope whatever broke is recoverable.
I didn't think so at the time, but after mowing the lawn I had a chance to reflect on the error of my ways!
(Having made a new split axle, I re-assembled the loco and managed to sheer a crankpin. Had to be on the axle which carries the motor/gearbox, didn't it?)
 

Steve Cook

Flying Squad
Whaaaaaaat?
I suppose it could be worse - you could have said 10mm modelling:eek:
:D You almost make it sound like its a bad thing :p
Its nothing major, just a small Ffestiniog coach I bought from IP last year at the 16mm Show. It only cost a tenner with wheels and I fancied doing something I hadn't done before ie building up a laser cut coach. It has the added bonus it'll run on the garden line, just need to build the Dingle Railcar to tow it :)
 

Steve Cook

Flying Squad
I didn't think so at the time, but after mowing the lawn I had a chance to reflect on the error of my ways!
(Having made a new split axle, I re-assembled the loco and managed to sheer a crankpin. Had to be on the axle which carries the motor/gearbox, didn't it?)
That'll be a double bugger then :( Can you get the crankpin out from the rear of the wheel or is well and truly in? That is just a git after you've made the new axle as well!
 

iploffy

OC Blue Brigade
[quote="Steve Cook, post: 33862, member: 32" just need to build the Dingle Railcar to tow it :)[/quote]

you build Wolverhampton railcars:))
 

Steve Cook

Flying Squad
Panicking...pretty much :oops: One week to go.
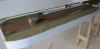
The last couple of weeks has seen the track ballasted and the point rodding installed (now painted)

Point Rodding In.JPG

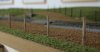
The station fencing / gates glued into place (Ratio bits), along with some scratchbuilt fencing for the 'running line' (post and wire for both, behind the track its all brass posts and nickel wire, the front is whittled down cocktail sticks - waiting to do some more scenics before adding those wires)

Fencing.JPG

The crossings and point lever (scrap of etch) for the loco release made and installed.

Crossing and Point Lever.JPG

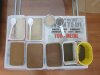
Last night saw all the scenic stuff dug out of storage. Some of it has been ground and sieved, some is 'out of the packet'. This is the Brown Selection (L to R), top row - ground Buff Fine Talus, ground Brown Fine Talus, ground Fine Buff Ballast, bottom row - Games Workshop stuff sieved to get rid of the large stones, Fine Brown Ballast, Jarvis Brown scatter, dried, sieved and ground mud from the garden and lastly the larger stones and bits of mud left over.
Browns.JPG

All of the green stuff has been sorted into long grass, short grass, trees, bushes, leaves and general scatter. This morning saw the sofa moved, a protective sheet put on the floor and the layout moved into a position so I can work all the way around it.

Middle of room.JPG

The cess is in place

Cess.JPG

And the base earth around the platform ends in place (see four photos up).

There are teabags in the cupboard, milk in the fridge, favourite songs in CD player and all the tools, glues and scenic stuff are scattered around the lounge and kitchen on any flat surface available. Its going to be tight, but all of the usual jobs (washing clothes, cutting grass, sorting business stuff) has been done, so its the rest of today and all of tomorrow to get the scenics done.
Mainly pictorial updates from now on as they are quicker, see you Sunday evening :)
 

ScottW

Western Thunderer
Looking good Steve, :thumbs: especially like the point rodding. I do have a pet hate for Peco track but you are making a good job of blending it in.

Regards,

Scott
 

Steve Cook

Flying Squad
Cheers Gents :)
it sounds like perfect weekend:thumbs:
I'll settle for that :D

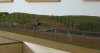
Starting to block in the colours and pathways now. Its a bit of a slow process - cover ground with scenic matter of choice, brush around and tamp down to get desired shape, soak with wet water (50/50% mix of IPA and water) from a pipette, then go back over with dilute pva. The pathway was done first, then the grass around the fence and the two humps, then finally the grass at the rear. The grass is a mix of two different shades, but you can barely tell whilst its drowning in pva :) Hopefully it won't all be wasted when the static grass goes over the top.

Starting to block in colours.JPG

Whilst that lot is drying, time to go onto the station board.
 

28ten

Guv'nor
You have done a good jobe on that Peco (or should that be PECO :)) ) track
What is the Games workshop stuff? I could be ideal fro claging up 7mm ballast
 

Steve Cook

Flying Squad
Cheers Guv :)
The Games Workshop stuff is called 'Modelling Sand', but half the container is more like pebbles :)) Biggest stuff is about 3mm in diameter, the smallest stuff is the same size as the Woodland Scenics Fine Ballast, just a bit lighter than the WS Brown.

I've been attacking the fencing since dinner, the wire and post fencing behind the running line has been given a couple of washes of brown to get rid of the starkness of the satin black, it has had the advantage of making the wire difficult to see :)

Disappearing wires.JPG

The wooden posts have had a little drybrushing to get a hint of grey to suggest they have been out a while

Wooden posts.JPG

All of the ratio stuff has been drybrushed with a light grey and a sandstone colour, plus attacked with weathering powders. I've gone a little over the top with the powders (as always) so I'll be taking some of it off tonight. I've gone as close to the wet scenics as I dare, it'll be a quick job to get the colours down to ground level tomorrow morning.

Grubby fencing.JPG
 
Top