The Norwich & Mucklemouth Railway - Eastern Eccentricity in EM

Herb Garden

Western Thunderer
@Dave F. Reminded me with his posts yesterday that I've now got a couple of months to the curtain goes up on expo EM in August. An exciting prospect but nervous. I'm keen for the layout to be at it's best but need to focus on what can be done in the next few weeks.
IMG_20260617_203448086.jpg
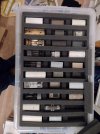
The rolling stock situation is worrying and a distraction at the same time. I feel I can be forgiven for having an unpaired coach wagon or loco but not an unpainted mill building. That said I do want to make sure it's all working. I've finally decided on which stock is coming. That at least focuses the mind to 30 pieces of stock (cos that's all that fits in the stock box) (@Liver & Fry note the two empty spaces).
IMG_20260617_222849281.jpg
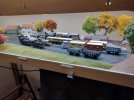
Here it all is -2 cattle trucks posed on the layout feels like I'm trying to do a lot in the time but here goes.
IMG_20260618_160042453.jpg
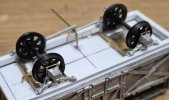
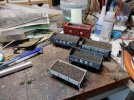
My health continues to be troublesome so this week just gone I've had to take it easy. To bolster the wagon fleet I've decided to convert some RTR wagons rather than build kits in the time I've got. Here they are re wheeled and weighted just need loads couplings and weathering
 

AJC

Western Thunderer
I shouldn’t worry overmuch about the mill: most people (especially at something like Expo), are tolerant of works in progress, especially if the thing works!

Stay hydrated and take it easy. Good luck.

Adam
 

Liver & Fry

Western Thunderer
I should probably post something to prove I have been working on the cattle vans.

When I last posted here, we had discovered the need to remove the underframe as it represented a wooden example rather than the steel underframe that was used on the Dia.7 vans.

I was unsure if @Herb Garden was going to make up some brass underframe sections, or find another way but in the end he supplied some plastic U channel to the correct width.

I have already done the underframe on one van, but I didn't document my process, so I shall show you as I progress with the second van.

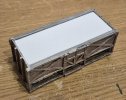
First of all, measure and cut the parts to the correct length, and profile (for the ends):

20260625_221035.jpg

Second, attach one end to one side and ensure they are square whilst doing so:

20260625_222557.jpg

Next I will be attaching the two halves together...

As I say, I will dip in and out, drip feeding progress as it happens!

- James
 

Liver & Fry

Western Thunderer
Having successfully united both halves, it was time to move on to the next section:

20260628_211436.jpg

When doing the first van, I realised that the floor I fitted (correct to the internal positioning) was not set low enough for the W-irons, giving a ride height discrepancy. This was resolved by fitting a second floor underneath:

20260628_213705.jpg

The two 1.5mm strips seen in the first image are there to fit within the U-channel of the solebars to lessen the depth, as this was a tad too much:

20260628_213505.jpg

And then finally for tonight, the underframe was fitted to the body:

20260628_214804.jpg

- James
 

Liver & Fry

Western Thunderer
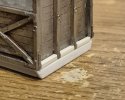
Once I was happy that the underframe was afixed properly, I turned my attention to detailing the ends; Dia.7 vans had outside framing, seperate of the bufferbeam and this would need replicating.

Using 1mm square baton strip, I filled in each gap between the uprights accordingly:

20260705_205352.jpg20260705_212335.jpg


I then turned the van upside down and marked up for the w-irons before fitting them accordingly:

20260705_222952.jpg

"And here's one I made earlier"...

20260705_223142.jpg

With that, the second van has now reached the same stage as the first van which I hadn't documented here.

The main focus points now will be brake/underframe detail and bufferbeams on both vans. With 30ºC temperatures expected again this week, I will not be doing work in the garden beyond watering the veg patch, giving me plenty of time to work on these!

- James
 

Liver & Fry

Western Thunderer
Well, lining up the brake shoes was a pain, owing to the fact the base didn't fit between the w-irons and so I had to figure out how to attach the casting to the underside, whilst still getting it in the correct position. Because of this, I've only achieved one set this evening, plus a single axlebox cover and spring, but you get the idea:

20260707_222248(0).jpg
20260707_222527.jpg

I plan to finish the axleboxes/springs on this one tomorrow before repeating all of the above on the other on Thursday.

- James
 

Herb Garden

Western Thunderer
Thanks to @Liver & Fry for carrying on with those cattle wagons

Now I'm back from my annual trip to the West coast of Scotland it's full steam ahead to get the layout as ready as it can be for Expo EM

IMG_20260706_213059374.jpg
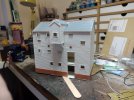
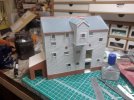
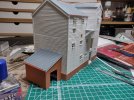
So the mill building is back in the workbench. The raw plastic was starting to stick out like a sore thumb so it's time to get this one finished. IMG_20260707_213245860.jpg
The main item that has been missing was the leanto engine room next to where the wheel is
IMG_20260708_065235608.jpg
Here it is glued in place

IMG_20260708_215506819_HDR.jpg
And with it's roof

IMG_20260708_215459907_HDR.jpg
It makes the building look even more substantial than it allready is....
 

Liver & Fry

Western Thunderer
Funny you say that because I've just finished doing the axleboxes and springs from last night as I had planned to!

20260708_223950.jpg

All to be repeated again tomorrow...

- James
 
  • Like
Reactions: AJC
Top