The Heybridge Railway, 1889 to 1913

Herb Garden

Western Thunderer
We went to the Middy today to see the railbus. I don't have a bucket list but I have never even been inside one of these before let alone travelled on one. And so we made the trip.

View attachment 266751

View attachment 266752
At Brockford.

View attachment 266749
View attachment 266750
At Aspall Halt.

We were both impressed by the comfortable seats and the ride! Of course it doesn't go very fast here but we had panoramic views of the countryside to enjoy.

This particular railbus is usually at the EARM at Chappel and it will be running again at the Middy next Sunday 28th June.
You've just inspired a project for next year Richard. Skeetsmere in the 50s! Now where is heljians website.....?
 

Simon H

Western Thunderer
Glad you enjoyed it. I travelled on one on the Saffron Walden branch while staying with friends of the family in my early teens. The experience was marked compared to that of an ‘ordinary’ train ride of the time and has remained with me as a fond memory. In recent times I have obtained a Heljan 4mm one, (converted to P4 and with Paul Chetter sound file), and I am surprised Heljan have not produced one in 7mm. The criticism I have seen of them is to my mind unjustified. Perhaps it is judged there would not be the demand but I think any of their railbuses would be ideal for a small 7mm mini layout of the kind that are around these days.

Bob
The "fond memory" seems to be a recurring theme from people who actually used them, both in the UK and the place that inspired them, West Germany...I follow a Facebook page that is mostly about the Uerdingen railbuses and it seems that even today they are a big hit both with railfans and the general public.
Back in the early eighties the KWVR used one of their W&M 'busses for a Saturday morning shoppers run down to Keighley.
No gricers, just a few locals (and the odd car load of idiots across from Cheshire), just a proper branch line doing proper branch line stuff.
The half cab allowed a fantastic view down the line, especially when you were sat next to the driver.
I've a vague recollection that a similar service was proposed for the K&ESR when the railbus was based there. It was certainly used for trips between Bodiam and Dixter Halt (just west of Northiam, and now closed) before that section of the line reopened...my trip took place one summer evening as a "Magical Mystery Tour " by vintage coach from Eastbourne, organised by Eastbourne MRS. The track was mostly hidden in the grass, and we chased a few sheep along part of the line.
 

Ian@StEnochs

Western Thunderer
I had a couple of trips between Ayr and Kilmarnock in the Park Royal rail bus when I was a lad. It was good from a spotters viewpoint, you got to see the road from the drivers viewpoint, but the ride as I recall was ‘lively’ to say the least. OK probably running a bit faster than current preserved line speeds but the sudden lurch to right or left on entering a switch was a bit disconcerting as was the nodding donkey motion on plain track. No welded rail then.
 

RichardG

Western Thunderer
In recent times I have obtained a Heljan 4mm one, (converted to P4 and with Paul Chetter sound file), and I am surprised Heljan have not produced one in 7mm.

Heljan produced the AC Cars railbus in 7mm scale and they can be had secondhand. There were a few liveries, one was Heljan model number 88911.

I would recommend watching one running before buying. The chassis has no suspension (and no coning on the wheels either) and mine resembled the mechanical hare at the dogs. The backs of the wheels need skimming to let the model get through 0-MF pointwork; I did this but I was never really happy with the model and it is now sold.
 

RichardG

Western Thunderer
I have now paused to emboss every remaining rivet. There are only a few, but they are on both sides of the etch . . .
. . . actually, this was also a mistake. If you are going to twist the axlebox keeper plates to resemble the GER design, it would be better to emboss the bolt heads after forming the parts. But this is proving a bit too intricate for me, so I will leave the keeper plates straight to match my other GER wagons.

DSC_2902.jpeg

I am using the RSU and the microflame torch for nearly all of the assembly, and the result is needing very little clean up. Well, so far.
Meanwhile, I have taken a break from the body of the sand wagon to build the roof.
DSC_2908.jpeg
Faults like this crooked hinge show up much more clearly in photos. If fact I could hardly see this on the model, but I did put it right.

Just a knife blade under the hinge and a brief application of the micro flame torch. The hinge simply lifted away, I cleaned it up and put it back. I could not have done this a few years ago.
DSC_2967.jpeg
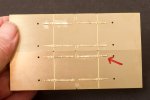
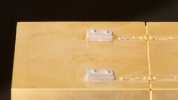
The door stops bring the need to put small castings onto a large expanse of brass. I am told I can use the RSU to do this but I haven’t yet sussed out a method without melting the casting.

My method is therefore to solder them up quite generously underneath with the iron, look for a trace of solder on the good side, and then clean up underneath (next photo).

DSC_2971.jpeg
The brackets underneath are mine, to try to make the roof detachable. At the moment, the roof wants to sit ever so slightly skew, just enough to annoy me, so I may end up with a few blobs of glue on these brackets after painting.

DSC_2969.jpeg
Completed roof.

Earlier this year I was muttering on here about a "plateau" in my modelling ability and do I think I have finally taken a step up thanks to the RSU. There is no mechanical cleaning up here except underneath the door stops. Having such a fine kit to build helps too.

 
( Diversion : soldering white metal to brass with the RSU ) New

simond

Western Thunderer
"I am told I can use the RSU to do this but I haven’t yet sussed out a method without melting the casting."

Richard, my method is as follows.

tin brass with ordinary solder, ideally a layer one atom thick. A little more is probably ok :)
tin W/M item with 70 deg solder, ideally a few microns thick
apply flux to brass
locate W/M item and secure with scalpel tip or whatever - if you can arrange gravity to help, so much the better.

Apply RSU to brass, close to item being soldered - say 5-10mm away. Either side, doesn't matter.
Press on toe-switch and watch the edge of the W/M part - you'll see the 70C solder melt and the part will settle.
Remove toe from switch and wait for it to cool.

On bigger things I sometimes put the 70C solder on so it leaves tiny peaks, these melt and the W/M part settles into place -again very visual.

Obviously best to practice on scrap bits - I have found the method very controllable.

atb
Simon
 

RichardG

Western Thunderer
Obviously best to practice on scrap bits - I have found the method very controllable.

Simon I have had a few goes.

It seems important to use 70 degree solder on the w/m part. For example 145 will not get hot enough to melt. I haven't tried 100. Using the 70, I can make a neat-looking joint. Putting little lumps of solder and watching the part settle down is reassuring. But the joint so created has minimal strength - I can pick the part off with my finger nail. As I would expect with 70 degree solder.

So I think this is a technique to remember, but I wouldn't choose it if I could use 145 solder a different way, such as from the back as as I did here. Those cast door stops will never come off.
 

RichardG

Western Thunderer
Well, I have been tinning the brass with some solder paint. Being a way to achieve the very thin coating.

It has occurred to me, I have never had any success with this solder paint. So I have had a go using 145 solder to tin the brass, and the 70 on the white metal part. This has produced a secure joint, but solder is visible all around the joint.

I am sure this is something to practice if I really want to do it. I obtained a neater and faster job by soldering the door stops from the back using 145 solder and letting capillary action draw the solder through a hole in the brass.
 

simond

Western Thunderer
Well, I have been tinning the brass with some solder paint. Being a way to achieve the very thin coating.

It has occurred to me, I have never had any success with this solder paint. So I have had a go using 145 solder to tin the brass, and the 70 on the white metal part. This has produced a secure joint, but solder is visible all around the joint.

I am sure this is something to practice if I really want to do it. I obtained a neater and faster job by soldering the door stops from the back using 145 solder and letting capillary action draw the solder through a hole in the brass.
I’ve had very mixed results with solder paint generally.

When I tin the brass, I use standard tin-lead solder and Powerflo. As long as it’s very hot, the solder can be wiped on very thinly, and if it’s too thick, a bit of solder braid will do the trick.
 

RichardG

Western Thunderer
The use of solder paint was suggested to me by a friend who uses the terms solder paint and solder paste interchangeably. I think the paint I have is made for the motor vehicle trade, as an under-primer for body panels. Brush it on and melt it with a blow lamp. All of my attempts to use it to create a soldered joint have failed.

Yesterday another friend suggested solder paint has a limited shelf life. I have put it in the bin :thumbs:
 

adrian

Flying Squad
The use of solder paint was suggested to me by a friend who uses the terms solder paint and solder paste interchangeably. I think the paint I have is made for the motor vehicle trade, as an under-primer for body panels. Brush it on and melt it with a blow lamp. All of my attempts to use it to create a soldered joint have failed.

Yesterday another friend suggested solder paint has a limited shelf life. I have put it in the bin :thumbs:
As I said there is a wide variation - this is what I use and it's in syringe to easy to place a small amount just where it's needed. Yes there is a "expiry date" but I suspect this set by the drying out of the carrier flux. I cap the needle when not in use, can't be bothered with storing it in the fridge either but even nearly 5 months after it's "expired" it's still working fine.

Solder_paste - 1.jpeg

Solder_paste - 2.jpeg

and half the price of the Carrs solder paste, added to the fact that CPC is round the corner for me so I can collect from the counter.


RichardG

Western Thunderer
Unfortunately there is a wide wide variation in what some traders flog as "solder paint".

As I said there is a wide variation - this is what I use and it's in syringe to easy to place a small amount just where it's needed.
Yes, this is solder paste.

It is completely different to solder paint, which is a different product, with limited application in model railways. Confusion arises when vendors describe solder paste as "solder paint", or people use the term "solder paint" when they mean solder paste.

DSC_3007.jpeg
Rescued from the bin.

This stuff can be applied by brush before heating and flowed with a flame. The result can be (with care) a very thin tinning; but the treatment is not suitable for building onto with 70 degree solder. The solder paint is also incapable of making a soldered joint on its own, for example between pieces of brass. I wasted hours (a few years ago) because someone told me to buy some solder paint when they meant solder paste.
 

RichardG

Western Thunderer
I have an ergonomic problem with model railway controllers. Faced with a mixture of throttle designs with a centre-off and a separate reversing switch, it always takes me a while to adapt from one to the other. And the Heybridge Railway has had a problem here for a long time.

Somehow, the centre-off throttle works best for me with a wireless handset, and I have such a handset for DCC for my H0 trains. The Heybridge Railway has eight locos in all: five analogue and three r/c ones. It is difficult to find a wireless analogue controller, and so it seems sensible (even logical) to ditch the analogue control in favour of DCC.

DSC_3009.jpeg
So the new arrangements look like this. Just like watching modern television really :)

I have salvaged three decoders from 00 locos I rarely run, and so my only outlay is to buy two non-sound decoders.

At a glance, 'Nellie' (Lenz) and 'Blackwater' (Zimo) are already running better than they ever did on analogue. 'Heybridge' and another loco will be plug and play when their decoders arrive. This just leaves the GER tram, which will be tricky - it has a modelled interior and hardly any free space inside.

The trigger for this has been seeing how well a couple of unrelated 0 gauge locos are running with DCC. It is as though the better running of 0 gauge over smaller scales continues with DCC. There is still no sound though. I just don’t enjoy it.

I am still not entirely happy. I do find DCC a misery to set up, and fault-finding can be exasperating. But I am telling myself, setting up is a one-time activity. Heybridge Basin is electrically simple (and wired for DCC from the outset), and the Roco z21 Start has been reliable since purchase. I expect I will get the hang of things.
 
Top