
You are using an out of date browser. It may not display this or other websites correctly.
You should upgrade or use an alternative browser.
You should upgrade or use an alternative browser.
The D&RGW and Rio Grande Southern in 0n3
- Thread starter PhilH
- Start date
-
- Tags
- d&rgw narrow gauge


PhilH
Western Thunderer
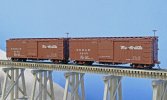
So what do you do when you've got several unfinished jobs on the go and can't decide which one to do next - start another ! Actually this one had already been started by someone else so getting it finished didn't take too much effort.
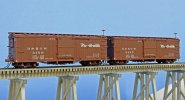
I was given two part completed D&RGW 0n3 box cars by a friend who had acquired them in the same condition, presumably originally constructed from kits. The bodies are built of wood with moulded plastic doors and brass detail castings. As received they were more or less complete apart from paint and lettering, but I added the end supports to the roof walks, a couple of missing door stops, couplers, air hoses and most of the grab irons needed straightening or refixing. The trucks are cast brass and were provided with sprung pivots, as I don't like wobbly freight cars ! Painting was first with Tamiya red oxide primer; then a mix of Tamiya acrylic browns and red to represent D&RGW boxcar red (slightly redder than the usual boxcar red); Vallejo gloss varnish (before decals) and Vallejo satin varnish (after decals). I found the result a little too shiny so finished off with several coats of Dullcote. The decals are by Thinfilm and there's quite a lot of lettering on these cars, including the numbers applied individually there are 40 separate decals on each car.
PhilH
Western Thunderer
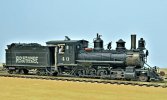
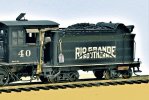
I bought this Mountain Model Imports Rio Grande Southern #40 from a friend already equipped for DCC sound and reasonably well weathered. One problem was the tender had different 'Sunrise' decals on each side and one wasn't properly fixed and had started flaking off. Other problems with the tender were it had a backup light which the prototype didn't have and the pipework from the air tank was incorrect.
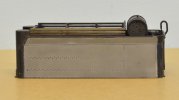
Most of the loose decal came off quite easily but efforts to remove it all revealed the earlier livery underneath with a large number '40', so I decided to strip both of the tender sides completely down to the bare metal diecasting. Various 'chemicals' were used plus scraping, but removing all the old paint around all the rivets proved difficult, so I masked any areas I didn't want the paint removed and stripped the remaining paint off by grit blasting.
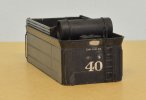
The tender rear with the backup light removed, the ladder was later removed to the centre. The only photo I could find showing the rear of the tender indicated that instead of the usual large loco number in the centre there were two smaller numbers low down on each rear corner.
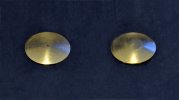
Two new domed ends were turned for the tender air cylinder with the pipework connected to the centre.
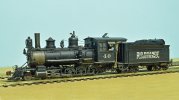
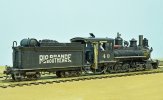
The tender sides and ends were repainted with Tamiya grey primer and semi gloss black, then Thinfilm decals applied and varnished with Vallejo satin varnish. This was a little bit shinier than I liked so it was given a light coat of Dullcote.
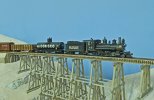
The only work required to the loco itself was the slight adjustment of the back to back on two sets of drivers and a spring under the pony truck pivot to prevent its habit of occasionally jumping off the track. A seated fireman was added to the cab to replace the previous standing one balanced on the front of the tender.
The tender still requires the addition of the air retainer pipework at the front of the right hand side and I have a suitable brass casting, I think - somewhere ?, which requires fixing - if I can find it.
PhilH
Western Thunderer
Back to the trestle
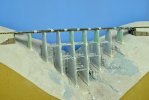
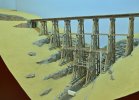
It seemed a good idea (before I started !) to cover the woodwork before painting the plaster. Maybe a bit of cling film would do the job, but no it didn't and it turned into a major operation with paper, masking tape, cooking foil and cling film.
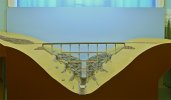
The result so far - I was aiming for a light brownish grey for the rock and I've fiddled about with it for days, washes, sprays, dry brushing, lighter, darker, highlighting the top edges in white, etc, etc, and I still think it needs a bit more brown.
The ground cover will be a sandy brown colour representing dirt and scree and when that's in place I might have another fiddle with the colour of the rock. Grass will be minimal, just a few clumps here and there, with bushes and spruce trees, the latter mainly at the rear behind the track.
I decided that a photo printed window blind wouldn't work so I've added a hardboard backscene on which I'll paint the scenery, or should I say have a go at painting the scenery.
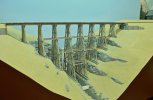
I need some small pebbles to go in and around the river before I add the water.
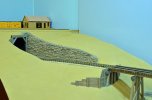
For a different view I must confess to sitting on the floor sometimes and watching the trains going round overhead.
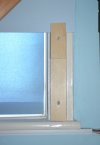
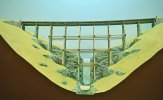
The backscene sits on two supports sitting on the window sill and fixed to the window frame at each end and there's also another support from the window sill in the centre.

and its fixed at the top with two small clips fixed to the window frame. By removing the clips the backscene can be lifted out clear of the window.
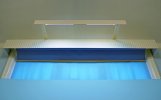
Additional lighting is by two 12v LED bar lights fixed to the window pelmet and this has effectively eliminated the shadow of the trestle on the backscene and put it more appropriately under the trestle.
It seemed a good idea (before I started !) to cover the woodwork before painting the plaster. Maybe a bit of cling film would do the job, but no it didn't and it turned into a major operation with paper, masking tape, cooking foil and cling film.
The result so far - I was aiming for a light brownish grey for the rock and I've fiddled about with it for days, washes, sprays, dry brushing, lighter, darker, highlighting the top edges in white, etc, etc, and I still think it needs a bit more brown.
The ground cover will be a sandy brown colour representing dirt and scree and when that's in place I might have another fiddle with the colour of the rock. Grass will be minimal, just a few clumps here and there, with bushes and spruce trees, the latter mainly at the rear behind the track.
I decided that a photo printed window blind wouldn't work so I've added a hardboard backscene on which I'll paint the scenery, or should I say have a go at painting the scenery.
I need some small pebbles to go in and around the river before I add the water.
For a different view I must confess to sitting on the floor sometimes and watching the trains going round overhead.
The backscene sits on two supports sitting on the window sill and fixed to the window frame at each end and there's also another support from the window sill in the centre.
and its fixed at the top with two small clips fixed to the window frame. By removing the clips the backscene can be lifted out clear of the window.
Additional lighting is by two 12v LED bar lights fixed to the window pelmet and this has effectively eliminated the shadow of the trestle on the backscene and put it more appropriately under the trestle.
PhilH
Western Thunderer
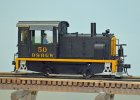
The latest acquisition for the 0n3 narrow gauge layout is the AMS (Accucraft) D&RGW #50. Its a brass model factory painted and I've fitted it with Kadee couplings and DCC sound.
The prototype was supplied new in 1937 by Davenport to the Sumpter Valley Railway in Oregon, and used for switching 3ft. gauge and standard gauge cars on the mixed gauge track at Baker City. The couplings at each end could be raised or lowered by means of vertically mounted air cylinders to suit whichever gauge car as required. In 1963 it was sold to the D&RGW, the only narrow gauge diesel loco they actually owned, and used for switching at Durango. At Durango the moveable coupling arrangement wasn't required and the air cylinders were disconnected from the couplers although they remained in place.

In 1970 it was sold to the Roaring Camp and Big Trees Railroad, a tourist line in California, and I photographed it there in a dismantled state in 1978. It was subsequently acquired by the Colorado Railroad Museum and has been fully restored to working order as D&RGW #50.
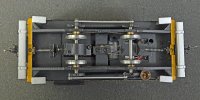
It wouldn't take the Kadee coupler boxes so I had to modify the couplers with a brass insert in the coupler shank which pivots on a 10BA screw, drilled and tapped into the thick brass end beams. A spring at the rear centres the coupler.

The 1 amp Soundtraxx Tsunami2 decoder, stay alive and speaker are fitted in the engine compartment together with the wiring and resistors for the LED lighting, so there's just four connections between the body and the chassis. The decoder just fits between the top of the bonnet and the highest part of the motor.

The new Tsunami2 decoders are much smaller than the earlier ones, the equivalent 1 amp earlier decoder is shown alongside for comparison and fitting that would have been a problem.

Because the subject matter is so far from my own railway interests (real and model), I hadn’t previously looked at your thread — until yesterday. Everything about your railway is wonderful. From the clever design in a limited space, the excellent baseboard construction, super-looking track and great scenic work. Really outstanding.

PhilH
Western Thunderer
Good evening Phil and group.
Was just wondering if you have an update to past onto us 0n3 modellers as there is very little to show on line!!
Thanks.
James.
James,
Unfortunately no, I haven't done anything on the 0n3 layout for the last 12 months, apart from running the odd train round.