Tales from The Room of Doom. Dipping a toe in various bucolic backwaters.

PMP

Western Thunderer
In other news, I have been working on a rather old layout.

Ranelagh Bridge was built around 2012 by a friend of mine and featured in BRM in July 2014. It was exhibited at a number of exhibitions for a few years then quietly retired.

View attachment 267636


At some point, it found it's way to Lord and Butler, where it it appears to have had some work done to it...............It was certainly not as built by my chum.

When I started there, some four and a half years ago now ( ! ) it wasn't really doing much, other than taking up rather a lot of much needed space. It wasn't operable and frankly looked unfinished and a bit of an eyesore. I offered to store it, with a view to improving both it's appearance and allowing something to move about.

Well, I finally had a look at what was involved a couple of weeks ago. It wasn't encouraging..Who ever had tried to up date the wiring, had simply ( in my opinion ) had just over complicated things and had actually not covered the basics. The layout was DCC. Keeping it simple, the layout needed to have the track live ( obviously ) and the presentation needed improving, mainly because it looked unfinished and essentially crap following it's " upgrade ".

Wiring was a nightmare and the layout was hugely over weight.

First job was to a few pounds and everything, backscene, 'roof' and ends all came off. It had also been extended using a lump of 3x 2 at one end where a bathroom mirror had been added.......

View attachment 267634

The wiring was a nest which seemed to have been added to without any real plan..Colours changed on runs and multiple wires stuffed into screw terminals. I am as far from an expert on layout wiring as you can get and as a result, it has to be simple. This was not simple. Bizarrely, the point motors were wired, but there was no provision to make them move or in fact power the frogs. I am not about to lift the track so that was out though to do it properly, that should be done. So I've decided to dispense with that as it really isn't needed for what will be a display/ test track..

Literally, yards of predominately red wire have therefore been cut out.

View attachment 267635

The track is now 80% powered. The stumbling block is a Peco asymmetric 3 way point which has no power whatsoever going to it but given it's location, it leaves a small section of the layout unpowered. Access to the rest is fine and will be sufficient for what is required of the layout.

View attachment 267633

This is proving to be an interesting exercise. The on layout lighting to buildings and lamps is being worked on and should be completed over the weekend and I hope to start on the replacement backscene and fascia, etc.

I will update accordingly.

Rob.
I’ve just fitted MP1 point motors to (tt120) shelfie5, and they have built in frog switching polarity. They’re also compact, so may be worth investigating if you’re looking to activate the three way. Mine are powered from an old mobile phone charger
IMG_0517.jpeg
This was before a subsequent tidy up of the wiring, as I too am back of the class material for wiring students!
 

Flaxfield

Western Thunderer
At a recent show one of my old layouts was there and I got asked to have a look as no points were working. It had been converted to dc by adding a seeming birds nest of wiring into choc blocks! Tracing power was very difficult and it was all loose so i suspected a crucial wire off somewhere, I politely left them to it as i had to run my layout and the chap who did it was now en route.
Turned out the wrong power supply had been plugged in! :drool:All it really needed was labelling to avoid that ;)
I’d have just put a few single pole isolating switches in to achieve the same thing with far less wiring.
Good luck with the renovation, when it comes to powering frogs I just drill a hole through and run an extra wire then cut the rails to isolate it between two chairs so it’s supported well.

Hi Paul.

My solution has been to remove even more of the wiring, again seemingly without any ill effect. The lights in the buildings are now working, with the exception of the three houses at the one end of the layout. I have also trimmed off some 50mm of track and base board, moving the buildings up accordingly. This now puts the layout back to it's original size. I'm not, however, reinstating the sector plate and have removed the last remaining track from behind the scenes in that area. As a result, more wiring has been removed.

I shall give the frog remedy some thought. That's a good idea.


Hi Jonte.

Thank you for your thoughts. Bang on. Those photos are fab and yes, I had a fleeting thought of how a terminus could fit into this same area. The two boards are 105cm x 60cm and 107cm x 60cm respectively, so not huge. A respectable pre-grouping terminus could be acheived using the same basic orientation of the track plan.

The houses, by the way, are Bachmann Scenecraft resin jobs. Ordinarily, if this were my build, I'd be painting and weathering but this isn't in the brief. If I start that then this is no longer a quick recondition. No, I'll save that for my own projects.

But don't be surprised if photos of SE&CR stock posed thereon appear.......

Rob
 

jonte

Western Thunderer
Hi Paul.

My solution has been to remove even more of the wiring, again seemingly without any ill effect. The lights in the buildings are now working, with the exception of the three houses at the one end of the layout. I have also trimmed off some 50mm of track and base board, moving the buildings up accordingly. This now puts the layout back to it's original size. I'm not, however, reinstating the sector plate and have removed the last remaining track from behind the scenes in that area. As a result, more wiring has been removed.

I shall give the frog remedy some thought. That's a good idea.


Hi Jonte.

Thank you for your thoughts. Bang on. Those photos are fab and yes, I had a fleeting thought of how a terminus could fit into this same area. The two boards are 105cm x 60cm and 107cm x 60cm respectively, so not huge. A respectable pre-grouping terminus could be acheived using the same basic orientation of the track plan.

The houses, by the way, are Bachmann Scenecraft resin jobs. Ordinarily, if this were my build, I'd be painting and weathering but this isn't in the brief. If I start that then this is no longer a quick recondition. No, I'll save that for my own projects.

But don't be surprised if photos of SE&CR stock posed thereon appear.......

Rob

Great stuff, Rob :thumbs:

I think the houses which look great btw would help with the hemmed in look, conducive to these types of termini where land I suppose was at a premium.

As you write, the baseboard dimensions aren’t the most generous for a terminus station, but as Monks bears witness to, many of these early termini weren’t of cathedraleasque proportions of later termini, and were crammed into wherever space was available. Good use could therefore be made of your short pregrouping stock such that the platforms could be kept to a minimum. The odd inclusion of some ‘vans’ would also help to keep you busy shunting here n there, and remember, that while the three way point is a great help as a loco release for two of the prospective platforms, many of these centre roads were used merely to store stock in between services, shunters then pulling out the stock at the platforms to release the loco at the buffers.

I want one!!!! :)

Jon
 

David Hall

Western Thunderer
Hi Rob.

Looks like you've got your hands full there.

I was involved in brining a layout back to life recently and it was hard work. Actually, I'd say it was far more difficult than building a layout from scratch. It's almost like you're trying to get into the builders head to decipher what is going on. That can be tricky!

Similarly, the wiring was a nightmare on that particular layout. In the end we went back to square one and removed everything. We did get there though, and it was lovely to see it running again after many years in storage.

So, best of luck
 

Flaxfield

Western Thunderer
Hi Rob.

Looks like you've got your hands full there.

I was involved in brining a layout back to life recently and it was hard work. Actually, I'd say it was far more difficult than building a layout from scratch. It's almost like you're trying to get into the builders head to decipher what is going on. That can be tricky!

Similarly, the wiring was a nightmare on that particular layout. In the end we went back to square one and removed everything. We did get there though, and it was lovely to see it running again after many years in storage.

So, best of luck

Morning, David.

I must admit, I voiced that very thought yesterday as I was cutting away surplus 'additional wood' , added after the original build, which seemed to serve no purpose other than to give me something else to cut away.

I've also modified the bridge, cutting it back to give a better run to the backscene in that area.

And on the subject of the backscene, I popped and clamped some of the replacement in place. Currently then, things look thus.

1000033977.jpeg

Rob
 

Yorkshire Dave

Western Thunderer
I must admit, I voiced that very thought yesterday as I was cutting away surplus 'additional wood' , added after the original build, which seemed to serve no purpose other than to give me something else to cut away.

Seeing the underside and the Dreadnought battleship construction I'd not only be cutting away surplus wood but also drilling as many lightening holes possible in the cross members.
 
I’ve just fitted MP1 point motors to (tt120) shelfie5, and they have built in frog switching polarity. They’re also compact, so may be worth investigating if you’re looking to activate the three way. Mine are powered from an old mobile phone charger
View attachment 267691
This was before a subsequent tidy up of the wiring, as I too am back of the class material for wiring students!
That’s the tidiest untidy wiring I have seen.
 

Lawrence Boul

Western Thunderer
Hi Lawrence.

They look funky. Are there smaller that the factory NEM loopy couplings ?

Rob
They were originally a commission for a customer happy to make them more widely available.

He provided drawings for couplers fitted to the L&B loco 'Lyn'. These are a more or less scale copy. This is the extent of my exposure to OO9, but those who use them have been positive. If your wagons have the fitting the NEM fit are easy, if scratchbuilt then the plain boss are a better choice. I'm aware they are not the most common on the prototype, but they look better than the toy type. As with all choppers you need to have the patience to lift hooks.

Plug-in Coupler.JPG
 

Simon H

Western Thunderer
I may have strayed into 009 world......
I did that a long time ago...

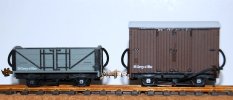
I also have a few of the new Rapido vehicles, shown here on my little 009 Inglenook. Sorry the lighting's a bit weird, I pinched the light fitting for my 0-14 layout. The second pic shows some wagons I built from typical plastic kits by (l to r) Colin Ashby, Chivers and the 009 Society, all fitted with Greenwich magnetic couplings:
 

Attachments

  • 17843770479337012806288801236099.jpg
    17843770479337012806288801236099.jpg
    252.1 KB · Views: 21
  • 17843771281848513636937233695053.jpg
    17843771281848513636937233695053.jpg
    249.6 KB · Views: 18
Last edited:

simond

Western Thunderer
I hope I'm not breaking any forum rules here: OO9 couplers – NEW ZEALAND FINESCALE
I don’t think so, you can always “report” your own post, and Adrian will give you any relevant guidance. He did post about small suppliers a week or two back, the search function works:

Post in thread 'NOTE...Please Read Before Placing Ads'
https://www.westernthunder.co.uk/threads/note-please-read-before-placing-ads.786/post-355583

meanwhile, Rob, please forgive the thread drift, I looked at Lawrence’s website and found the page on 3DP track, which our friends over on the Templot club are also working on. SUPPLIES - Trackwork costs

a bit of trans-global synchronicity, perchance?
Simon
 
Top