4mm Morfa - The race is run.

Neil

Western Thunderer
Bridge also available in black.

Yesterday, after many test pieces to determine what materials I should use to turn the bridge from 'fresh sawn timber' to 'years of Cambrian rain and sun', I decided that guaranteed perfection was still some way ahead and I should just get on and do it. So I did.

men at work 001.jpg

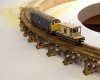
In the end I decided that the water based dark oak wood stain was good enough. I found a suitably sized tin so I could dunk the otherwise fiddly piers one at a time and followed this by sloshing the stain all around the flatter parts with a primary school style big round paintbrush. There's a little touching up to do, principally the straps round the doubling baulks on top of the piers. In preparation for the painting my tiny workforce are off loading some equipment. Here a stirring stick is eased off the match truck.

Whilst further along the deck, the tins of Humbrol have started to be off loaded. One of the lids appears to be a bit stubborn.

men at work 004.jpg

At the Morfa end of the span, sleepers and ballast have been deployed in readiness for rail and chairs to connect the bridge once the program of work is complete.

men at work 005.jpg
 

Neil

Western Thunderer
And looking on the even brighter side they were lucky the gaffer hadn't chosen the manure truck for the paint stirrer:D ....

A most perceptive statement Simon, the manure wagon was first choice for the paint stirrer, but the removable load of cattle jobbies had become stuck precipitating the deployment of a back up vehicle.

I'm pleased to report that the detail painting (the straps at the top of each pier) is done so the even bigger brushes can be brought out to tackle where the sea and estuary will be. I aim to prime and level the surface before the bridge gets stuck down, the final colour and layers of varnish will come later, so there's a couple more days before the glue comes out.
 

Neil

Western Thunderer
High water in the Mawddach today was at 10:56 so by early afternoon it was well into the ebb. However on Morfa Mawddach's mini-me the tide seems to be further in, at least so far.

the tide is high 1.jpg

Phase one of adding the estuary has commenced with a slosh of primer over all of what will be the confluence of river and sea.

the tide is high 2.jpg

The grey primer is partly to seal the surface and partly to act as a witness coat. I know that there are a few obvious screw holes that need filling, but there are also joints between sheets of chipboard and some previous iffy filling that I want to remove all trace of. In the past a couple of my layouts have had tell tale textures grinning through the water. They have been the biggest irritants. Many things I can overlook, missing downspouts, point rodding, signals and the like, but the geographical blunders nark the hell out of me. The next stages to watery perfection (if only) will be wood filler, sandpaper and some rather fabulous brushing filler that gives an utterly gorgeous finish to the full sized Corris carriages.
 

Steve Cook

Flying Squad
Its amazing just how much difference a coat of primer can make - the shots above look absolutely fabulous :) The best bit though, is the trigger for the minds eye to fill in the blanks / cover up the remaining chipboard and gain a real impression of whats to come.

Not heard of brushing filler before Neil (at least in household/wood terms), can we have a shot of the can when the time comes please?
Ta
Steve
 

Alan

Western Thunderer
Must agree with Steve about the shot above. It's great to see a large expanse of water, or will some of it be mud?
 

Dog Star

Western Thunderer
When you have finished the painting and weathering, please post another picture of the bridge supports, as in post no.#370, as I wish to see the result of "wet, green, slime" mixed with "brown, black, sludge". The starting point looks so good that the completion shall be something special.

regards, Graham
 

Neil

Western Thunderer
..... Not heard of brushing filler before Neil (at least in household/wood terms), can we have a shot of the can when the time comes please?
Ta
Steve

Here we go Steve:

filling up 1.jpg

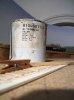
Not all the label is visible, if it was you be able to tell that the paint came from Williamsons of Ripon. It's not really a household product, but I just happened to have a part used tin in the garage.

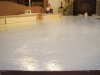
After my last post I'd filled in the holes and hollows with Ronseal wood filler (in a small plastic tub) and once set sanded and scraped it flat. How I hate sanding. After mass dust removal I've put the first coat of brushing filler on; this shot from another angle hopefully gives some idea of the full extent of the water.

filling up 2.jpg
 

Steve Cook

Flying Squad
Here we go Steve:

Not all the label is visible, if it was you be able to tell that the paint came from Williamsons of Ripon. It's not really a household product, but I just happened to have a part used tin in the garage.
Cheers Neil :thumbs: Search engine working away as I type...

Thats a lot of water on Morfa...
 

Neil

Western Thunderer
... Thats a lot of water on Morfa ...

Yes it is, there's about six feet in one direction and ten in the other though land and the baseboard edges nibble into that total. Anyway here's what I did next.

the first layers of water 1.jpg

Last night I got out the paints, the same colours I used for the backscene, and mixed two colours up in a paint roller tray. They were a sandy tone and a pale cobalt blue (sky colour) darkened with burnt sienna. The sandy colour was sloshed around the shallows, the cobalt blue grey the deeper water, blending the edges whilst still wet. A two and a half inch paintbrush made short work of the job.

This evening I coated the coloured river/sea bed with its first layer of gloss acrylic varnish.

the first layers of water 2.jpg

Even at this early stage some sense of the sparkle is there. Unfortunately so is a sense of the brush marks, but I have a cunning plan involving stippled pva and further layers of tinted varnish to darken the sea a touch. I may finish off with the high gloss sheen that yacht varnish gives, but this is a way off in the future, my immediate priority is more layers and to work out exactly when I shall fix the bridge in place.
 

Jordan or Plymouth Mad

Mid-Western Thunderer
Just goes to show that to create an impression of open space, you really need..... open space!!!

I can't help wondering how many modellers, given the sort of space seen here, would fill it with as much track as possible..?:confused:
Probably why this layout is standing out as something that little bit different, and special....:bowdown: :thumbs:
 

Geoff

Western Thunderer
I can't help wondering how many modellers, given the sort of space seen here, would fill it with as much track as possible..?:confused:
Probably why this layout is standing out as something that little bit different, and special....:bowdown: :thumbs:

It just goes to prove that less can indeed mean more and how marvellous " Railway in the landscape modelling" can look when done to this standard. My imagination runs wild whenever I see photos of Morfa, even without the scenery in place I can visualize how the estuary might look at high or low tide or the scene on a typical grey Welsh day, it really has that feeling of place

Yes Jordan it is special and certainly different, a true classic in the making......
 

Neil

Western Thunderer
Thank you chaps, you're very kind. To be honest the sparse track and acres of scenery pretty much go hand in hand with the choice of location. As a youngster I remember 'Rhiwgoch' by Trevor Hughes though the notion of little railway in large landscape didn't properly form until the serialisation of David Jenkinson's 'Little Long Drag' in the Modeller. The extended Garsdale Road knocked my socks off in a way that the rest of the layout didn't. When he described its abandonment as being too complex for one man to properly benefit from and look after I wondered why he hadn't kept Garsdale and the fiddle yard and connected them up with plain track; it would have been epic.

Back to more practical matters. This morning I added a dark tinted varnish coat, applied by brush then stippled with sponge pads. After a gruelling shift in the Maespoeth workshops of the Corris Railway the spare hour before tea had me stipple a coat of neat pva over the sea and river.

Here's a photo of glue drying.

wet wet wet 1.jpg

And now in close up.

wet wet wet 2.jpg

The still wet glue has lightened the colour of the water, tests lead me to believe that the depth of colour will return once dry. I plan next to install the bridge, before the depth of varnish becomes so gr eat that it affects the carefully calculated levels at the ends. Future tasks include a further tinted layer, followed by layers of polyurethane varnish.
 
Top