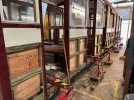
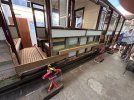
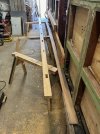
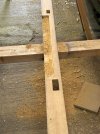
Lynton & Barnstable coach 7 arrives at the works for repair

Hayfield1

Western Thunderer
The East Anglian Group build and do major repairs of the trusts coaches. During planned maintenance of coach 7 at Woody Bay it was noticed there was a major issue with the center part of the wooded sole plate, this is beyond what the Woody Bay maintenance crew could handle, the decision was to return it to us in Colchester

8.jpeg

I don't know what is older, the lorry or coach, A delicate operation of backing up round the industrial buildings

1.jpeg

The good side of the coach


9.jpeg


Reversing down a narrow entrance

13.jpeg

The off load rails laid on top of our own track
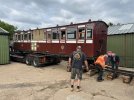
14.jpeg

The slow job of rolling the coach into the barn

15.jpeg

Inch by inch it slowly rolled in

17.jpeg

A keen eye watched the wheels

19.jpeg Finally in position

6.jpeg

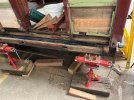
The repair job is to replace the center part of the sole plate, which has rotted away on the Welsh side (prevailing weather side) under the unique open compartment section, First job is to remove the paneling to uncover the extent of the damage and formulate a repair plan

As it happens we made a complete set of sole plates for coach 9 build, so we have spares to hand for the sole plate. The coach was built in the late 80's from donated materials, it was thought all the soleplates were oak, looks like one part eas from a softer hard wood, plus the steel in the underframe and oak are not good bedfellows

I will update the repair as it happens
20.jpeg

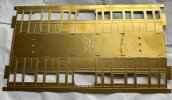
On a lighter note my own but smaller coach arrived yesterday, an eBay find of a Langley Models etched brass L&B special third class coach (I decided not to show the other parts

John
 

Hayfield1

Western Thunderer
21.jpeg

On arrival yesterday work on the coach had started, most of the lower coach side panels had been removed and a start on removing the coach doors had started

22.jpeg

The end lower panels are a bit harder to remove, we need these removed so we can get at all the bolts holding the body to the metal chassis

23.jpeg

It was the best news we could have got, only the center section of the sole plate has rotted

24.jpeg

The sealant between the coach framework and the metal panel failed allowing water to seep through, luckily for us only the center part rotted and one upright needs repair (looks like it was a repair anyway

Taking the doors off is a real pain, the spindle is made up top and bottom end caps, which are both a tight fit and glued in and the spindle, it takes between half an hour and an hour to remove each bottom cap

Still it could have been very much worse

John
 

Peter Insole

Western Thunderer
It is perhaps not so surprising that section of framing has suffered so badly, as it is around the open "observation" bay. It is also, I believe, the original surviving part of carriage number 7, around which the rest of the new "replica" was scarfed in!

At the beginning, as I recall, all the initial, major assembly work was carried out entirely in the unprotected open air... and over quite a prolonged timeframe. While still incomplete, I remember witnessing, (with no small degree of horror) on at least one occasion when the body also spent a period in open storage without the benefit of a tarp covering.

One other bit of evidence that also struck me from your latest images John, is that whilst that vulnerable centre section had been boarded over, it appears that the coach had been driven all the way from Devon with several droplights still open!

Then I remembered having to open the sliding rear lights on my Bedford Rascal van whenever I wanted to drive along a main road with my front window down... that is if I didn't want all the choking dust, sweetie wrappers and other rubbish from the back to go swirling round and past my ears on the way out!!

Maybe the lowered droplights were therefore a wise move... but if there was no such, or similar reason... then somebody, somewhere, should surely be in line for a damn good talking to?!

Pete.
 

Bigjohn

Western Thunderer
Renovator

Oak has an acidic content that attacks steel. Using steel bolts is best avoided but burning a hole with a hot poker carbonises the oak hole and offers some protection.there are a varieties of oak that have different properties. Cutting a large log into planks and boards for best usage is quite a dark art .
Bigj
 

Hayfield1

Western Thunderer
It is perhaps not so surprising that section of framing has suffered so badly, as it is around the open "observation" bay. It is also, I believe, the original surviving part of carriage number 7, around which the rest of the new "replica" was scarfed in!

At the beginning, as I recall, all the initial, major assembly work was carried out entirely in the unprotected open air... and over quite a prolonged timeframe. While still incomplete, I remember witnessing, (with no small degree of horror) on at least one occasion when the body also spent a period in open storage without the benefit of a tarp covering.

One other bit of evidence that also struck me from your latest images John, is that whilst that vulnerable centre section had been boarded over, it appears that the coach had been driven all the way from Devon with several droplights still open!

Then I remembered having to open the sliding rear lights on my Bedford Rascal van whenever I wanted to drive along a main road with my front window down... that is if I didn't want all the choking dust, sweetie wrappers and other rubbish from the back to go swirling round and past my ears on the way out!!

Maybe the lowered droplights were therefore a wise move... but if there was no such, or similar reason... then somebody, somewhere, should surely be in line for a damn good talking to?!

Pete.


Pete

Thanks for your contribution, when build the Essex Support group supplied a covering for the observation compartment for when not in use

As for the damage, according to Dave Ely (Full time workshop manager) there is no evidence of water damage other than that what can be seen coming from the joint of the lower metal panels and the coach framing, the Soleplate was sitting in water on the chassis at this point only. Simply a seal failed on the Welsh side which is the side that faces the prevailing weather

There are a couple of other timbers that need attention but nothing very serious

I guess its a problem most preserved lines are affected by
 

Peter Insole

Western Thunderer
Indeed John, and thank you for the detailed reply! Steel panels on timber frames was a fashion that almost seems to have been invented by the L&BR, (or at least they were way ahead of the game?) and I understand are a huge problem for carriage restorers and owners, particularly of grouping era/early BR stock! Such vehicles may have appeared smooth, stylish and thoroughly modern in their day... but that hid terrible, internal condensation issues that were busy eating away at the frames - practically from the word go!

Sealants (of any kind) are all well and good... for a time anyway... but will always fail at some point... usually in the most awkward and unexpected places!!

I also quite understand the difficulties that the group has had finding suitable, (and sustainable) accommodation throughout it's history, and to every member of the group's great credit, what has been achieved is utterly remarkable!

Pete.
 

Hayfield1

Western Thunderer
I will try and get a bit of history about the coach, I think it came back in for repairs after being built and as you said the trust tries to include as much of original material as possible.

Also since coach 7 was rebuilt/built a lot of things have been learnt in coach building, in the early days it was just a bunch of enthusiastic people simply having a go. Certainly now we have quite a few machines to enable us to form pieces, plus as well as reclaimed wood for the paneling, we are able to buy new hard wood, the replacement part will be made from French oak (using a piece made for coach 9) and lately use Iroko fot framing
 

Renovater

Western Thunderer
Do these coaches have low inside ventilation grills in the walls to reduce condensation build up ? For the beam on the solebar that's another problem....Colin.
 
Last edited:

Hayfield1

Western Thunderer
I don't think so, but in truth if the sides are built properly there should be no issues. The inside wall coverings are tongue and groove so its not airtight. Outside as well as sealant between the wooden sides and metal skin there are about 6 coats of paint and varnish, the last of which is the first line of defense. To put it into perspective, out of about 30 panels 1 joint failed (which may have been where a repair was made?)
 

Hayfield1

Western Thunderer
35.jpeg

We (the Tuesday team) arrived Tuesday morning to find all the doors have been removed and the bolts holding the sides to the metal chassis have also been removed

38.jpeg

The 3 compartments ate both ends are actually one open saloon, originally between the back to back benches were partitions which could be raised to make 3 separate compartments. We intend to reinstate this facility whilst the coach is in the workshop

42.jpeg We have rolled up the blinds to the observation compartment

40.jpeg View into the observation compartment

41.jpeg A photo into the observation Comp including one of the four fold up chairs


43.jpeg First we have to remove the bench slats to remove the current bench partitions, showing one partly raised


51.jpeg A gap between the benches where the new partitions will be located. Another team is checking the doors, and making any minor repairs needed

49.jpeg
The next job is to cut the tongues which hold the coach sides to the floor. The floor will be left on the chassis and using these bars (one in each compartment) we will lift the sides, backs and roof off the chassis to access and replace the rotten section

50.jpeg These are the stands and jacks we use to lift and hold the body above the chassis

As of last night a lot of the tongues have been cut through, more work on other things preventing the lifting will continue over the next few days
Monday is planned to fit the lifting bars, stands and jacks

Tuesday hopefully we will be lifting the body.

We have one full time paid carpenter/works manager, whilst most days there are the odd volunteer assisting Dave, on Tuesdays there is a group of up to 6 volunteers

Anyone who is interested in either joining us or just popping in to have a look we are just south of Colchester. PM me

John
 

Hayfield1

Western Thunderer
52.jpeg

Arriving at the workshop on Tuesday the lifting stands were in place. 6 each side and thankfully 7 of us turned up for the lifting process

57.jpeg

The area which has suffered the damage was strengthened to maintain the integrity of the body

58.jpeg

A further vies of the damage and the supporting material

As a gang of 7 six of us wound up the sides with the 7th member keeping an eye on what was happening

Simply we would up each side a few turns, then repeated the action on the other side. Just kept changing sides until we got the body up to the required height

59.jpeg59.jpeg

Showing the end lifted up

60.jpeg

The Welsh side (where the damage is) we used wedges to pack up the good ends of the sole plates, so we can safely remove the rotted material

I left after lunch as we have visitors so have no idea what was accomplished after lunch. What is not known is the condition of the tongues on the upright posts.

However so far so good and after 3 weeks we now are in a position to remove and replace the affected timber, plus do at least the 2 extra repairs we can see that need doing

Once the repair has been done the body will need lifting a bit higher, as we need to repaint the chassis which the body sits on, then the job of reassembling the body can commence.

In the mean time the doors are being serviced and we are removing wayward varnish from the glass

John
 
Last edited:

Hayfield1

Western Thunderer
61.jpeg

The rotted timber has bee removed

62.jpeg

And there seems to be no real damage to the uprights and their tenons

65.jpeg

The coach sides and ends are now held up with packing on the the coach floor


The French side is also now held up on packing pieces
63.jpeg


The French side is also now also held up with packing on the coach floor

66.jpeg

These are the sliding coach partitions which go between the seats

64.jpeg

We now need to make boxing to cover the gap left when the partitions are raised, these are battens to which we will nail tongue an grove planking on to hake the box

67.jpeg

Another area we are working on is the doors, one of several jobs is to install fine insect mesh behind the louvers

68.jpeg

Part of the internal sliding ventilation fitted. Its main use will be in the closed season, when the coaches are in storage, allowing ventilation to prevent condensation, but stop overwintering insects.

Next up is to drop the two sole plates, so when build we can fit the center section, one of the lads was drilling out some unmovable/ stuck-solid bolts

Still its going well and far better than feared
 

Hayfield1

Western Thunderer
Osgood

The joiner went to Woody Bay and looked at the issue, until we removed the metal side panels then removed the rotten wood we had no idea how large the issue was. Thankfully a small amount of additional work is required, but it could have been so much worse

Most repairs are done at Woody Bay, this is just too big a job for them. But we have a workshop plus the tools and a full time Joiner

Still I guess we still have at least 2 months work to do if not a lot more, plus we are taking the opportunity to upgrade the coach inline with the rest of the fleet

John
 

Hayfield1

Western Thunderer
We are quite pleased with the progress to date, still a long way to go, but so far mostly all work to date has gone smoothly


69.jpeg David working on the splice join (scarf joint?) for as near as possible a perfect joint

71.jpeg Right way up for the door treads to be let in

77.jpeg part finished for the door tread casting

70.jpeg Right hand sole plate removed from the side

72.jpeg A better view

73.jpeg The seats and partitions are holding the coach body up

74.jpeg We are working on the door fitting mesh in the door vents to prevent insects over wintering when the vents are open to allow moisture to escape

75.jpeg Original door slider 100+ years old

76.jpeg

The metal chassis which will be covered by the body is being painted prior to a rubber gasket being fitted
 

paulc

Western Thunderer
We are quite pleased with the progress to date, still a long way to go, but so far mostly all work to date has gone smoothly


View attachment 247062 David working on the splice join (scarf joint?) for as near as possible a perfect joint

View attachment 247064 Right way up for the door treads to be let in

View attachment 247070 part finished for the door tread casting

View attachment 247063 Right hand sole plate removed from the side

View attachment 247065 A better view

View attachment 247066 The seats and partitions are holding the coach body up

View attachment 247067 We are working on the door fitting mesh in the door vents to prevent insects over wintering when the vents are open to allow moisture to escape

View attachment 247068 Original door slider 100+ years old

View attachment 247069

The metal chassis which will be covered by the body is being painted prior to a rubber gasket being fitted
I do like the ingenious methods you guys use for holding things , it reminds me of how we would hold Mini bodies up when removing the front subframe/motor assembly . Needs must etc .
 

Hayfield1

Western Thunderer
I do like the ingenious methods you guys use for holding things , it reminds me of how we would hold Mini bodies up when removing the front subframe/motor assembly . Needs must etc .

The issue is we need to replace the center part of the sole plate, which usually supports the sides, plus its a lot more work to remove the floor from the chassis.

On the other hand safety is the priority, so its how can we safely support the sides ends and roof. Once the sole plates have been refitted and the chassis where the body sits on will be painted, the body will be squeezed back on the chassis. Then we can replace the lower half of the paneling, fit the beading then repaint the lower half.

Then we have a quick refit of the partitions, and add hat stands above the seats

John
 

Hayfield1

Western Thunderer
78.jpeg

Coach 7 is on the mend, as the new sole plate has been fitted

79.jpeg

Both sides of the chassis where the body sits on has been sanded back and painted


80.jpeg

One of the end splices

81.jpeg

We moved the chassis back and forth to drill 2 new bolt holes at both ends, it only had one bolt at each end after drilling bolt holes in the new sole plate

We then slowly dropped the coach body back on to the chassis to mark the chassis where the new bolt holes are on the solebar and end plates

I finished off repairing the coach doors, all now have mesh fitted in the ventilators, one outer casing is being glued back together, once dry its a 10 min job fitting it and the slider in place and I need to varnish one outer ventilator internal cover plate

David and Martin are busy in the paint shop giving a final coat to the moveable compartment partitions

I guess next week the body will be lifted to drill the bolt holes in the chassis, plus we are waiting for the rubber strip which acts as a gasket between the chassis and body

Once the body is back down on the chassis its fitting the metal panels and lower side beading, as well as updating the interior.

John
 

Hayfield1

Western Thunderer
With Guildex out of the way and have caught up with things put on hold the past 2 days I have had time to get on and make a start with my own L&B coach No 7

82.jpeg
A Langley Miniature Models etched brass kit, an eBay find of a few weeks ago. Its testing my resolve a bit, but thanks to having plenty of photos I can fill in the gaps left by the instructions

83.jpeg Fitted one end, steps and one solebar bulkhead

I have amassed 3 other Langley kits plus 2 Slater kits. Not all of the kits are complete, but I have not paid much for any. I seem to have all the parts stated in the kits instructions,

But the latest brake third seems to have and additional etch for the seats, door handles and grabs. I need to take stock of the first two kits (3rd & brake 3rd) I have both seemingly have no bogies or under floor castings and the 3rd no seats etc but one has door ventilators which this one is missing. Still I can work on building the coaches and perhaps cobble up some parts myself

Firstly a nice little project away from my experiments with 3D printed track

John
 
Top