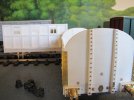
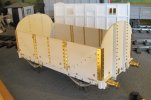
Early High Ended LSWR wagon.

Jon Nazareth

Western Thunderer
Rob
Yes, the door detail has been drawn incorrectly. The hinge going up under that top rail, as you suggest, does make sense now.
The other thin that I've noticed is that the side stanchions are reduced in thickness from the top of the sole bar upwards. What a very strangely designed wagon.

Jon
 

Jon Nazareth

Western Thunderer
I've obviously got this post the wrong way around as it should have been dedicated to the GER/LSWR wagon, hey ho. From now on, I'll post items to do with the High Ended wagon here.

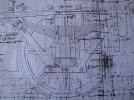
Here are a couple of pictures taken from the drawing that I'm following dated 1872 but revised in 1875. The revision is asking that all square nuts be changed to hexagon, no problem with me doing that!

My question here is asking if anyone has or knows of a drawing of an axlebox where the spring is bolted to it via these U bolts. I wouldn't mind having a go at making them only, I'm not really understanding what's going on . These are the only two details of the spring with the axlebox. In fact, the second picture, although in section, shows only one set of nuts. If nothing exists, I may just invent something.

Jon

IMG_4951.JPGIMG_4952.JPG
 

Overseer

Western Thunderer
I've obviously got this post the wrong way around as it should have been dedicated to the GER/LSWR wagon, hey ho. From now on, I'll post items to do with the High Ended wagon here.

Here are a couple of pictures taken from the drawing that I'm following dated 1872 but revised in 1875. The revision is asking that all square nuts be changed to hexagon, no problem with me doing that!

My question here is asking if anyone has or knows of a drawing of an axlebox where the spring is bolted to it via these U bolts. I wouldn't mind having a go at making them only, I'm not really understanding what's going on . These are the only two details of the spring with the axlebox. In fact, the second picture, although in section, shows only one set of nuts. If nothing exists, I may just invent something.

Jon

View attachment 180356View attachment 180357
That looks like 1850s technology rather than 1870s, on goods vehicles anyway. I have similar drawings which do not explain exactly how the spring shackles connect to the axlebox. These photographs, the first built by Bray & Waddington in Leeds in 1862 and the other a couple of years earlier but not sure on manufacturer, might help you work out what is being shown in the drawing.

g8 detail.jpg
k detail.jpg

Looking at your drawing it looks like the 'U bolt' might be shaped more like a tennis racquet with a single threaded end below a loop.
 

Jon Nazareth

Western Thunderer
Overseer
Thank you for the pictures. In my axle box, to me it looks as if the U bolt legs pass through the box itself as they aren't shown at all. Yours must have a plate that goes under the box and that may be a better option for me.

Jon
 

Jon Nazareth

Western Thunderer
For anyone interested, the Colburn book is available online at Hathi Trust - Catalog Record: Locomotive engineering, and the mechanism of railways : a treatise on the principles and construction of the locomotive engine, railway carriages, and railway plant ... Illustrated by sixty-four large engravings and two hundred and forty woodcuts.

This is the drawing which has been traced by several people.
View attachment 177580

I don't know if the LSWR also had similar wagons. Over the years I have also been unable to find photographs of GER wagons which match the length of the wagon drawn in Colburn. Adrian Mark's piece linked to by Dog Star has a good photo of a GER wagon of this type but the axles are closer to the ends than the drawing shows. Richard Davidson built his model to match the drawing rather than the photos. There are also photos taken at Mistley Quay which include side views of these wagons which also look shorter than the drawing. Were there two lengths? Or more photos?

Sorry Jon for the thread drift.
The 4" base pads on these buffers appear round to me. Anyone else think this? I'm referring to the drawings posted by Rob R.

Jon
 

Rob R

Western Thunderer
Jon,
Based on what little photogaphic evidence there is in the Selsey books the buffer base is square with a bolt in each corner.
I will keep looking to double check.
Rob
 

Jon Nazareth

Western Thunderer
Rob

The later ones, I must admit, do appear to be square but these early ones do look round to me, the fixing bolts passing through the buffer housing, through the pad and then through the buffer beam.

Jon
 
Last edited:

Jon Nazareth

Western Thunderer
Rob,
Don't bother about looking to check as I've made yet another mistake and have had to fit completely wrong buffers. I'm hopeing that the next wagon won't turn out the same way.

Jon
 

Jon Nazareth

Western Thunderer
Now that the disaster of the LSWR/GER wagon is now complete, apart from painting and transfers, I'm moving on to the high ended wagon.
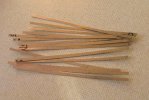
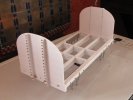
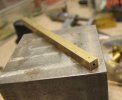
Here we have some strips cut from a piece of .018" nickel that is practically spot on for 3/8" thick leaves. I have a rather nice guillotine that is ideal for cutting this sort of stuff. It has a cast aluminium base and I'm thinking of trying to make up some sort of stop that will enable me to cut the leaves to length. There are 52 leaves in all and I think that a stop would be an ideal add-on.
The other pictures are the spring itself and the wagon build so far.


Jon

IMG_4996.JPGIMG_4997.JPGIMG_4997-001.JPG
 

Jon Nazareth

Western Thunderer
Moving onto the buffers for this wagon now. Looking at them this morning, I find that a couple aren't to my drawing. I'll be remaking those this afternoon, hey ho.
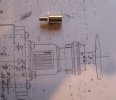
My thinking for that cotter, and it is only thinking at the moment, is to drill a 0.5mm hole through the shank of a .032" rivet which will make the cotter itself. The retaining pin will be a bit of nickel wire or maybe a 0.5 rivet with it's head flattened a bit.

Jon

IMG_5004.JPG
 

Mike W

Western Thunderer
Jon, if I’ve understood it, you’ll take a 1/32 rivet (32thou) and drill a 0.5mm (20thou) cross hole through the shank, leaving a wall thickness of 6thou each side? Is this Gauge 3 or are you really a frustrated 2mm modeller? Tim Watson and Ian Smith have a lot to answer for!
Mike
 

Jon Nazareth

Western Thunderer
Mike
I've measured off the drawing and the cotter comes out at 1/32" and 0.5mm is the smallest drill that I have. I couldn't think of another way to represent the cotter and pin. Mm, maybe, I'll have to rethink that one. :D

Jon
 

Jon Nazareth

Western Thunderer
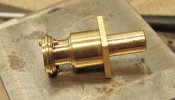
Here we have the buffers but minus their cotters and the four fixing bolts, the week end will probably be a good time to think about those. There are some 'foot pads', for want of a better word, on the buffer housings to think about too but they can come later.

Jon

IMG_5006.JPGIMG_5009.JPG
 

Jon Nazareth

Western Thunderer
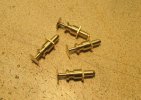
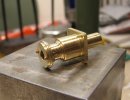
Well, Mike, it worked first time and I'm very surprised, a 0.5mm hole in a .032" rivet. If the little cross drilling jig hadn't have worked out first time as it did, I don't think that I would have bothered trying again but, it did! I've used these copper rivets as the heads are slightly more rounded than the brass ones that I have. I don't like the retaining pin but I couldn't think of an alternative at the time. While writing this, I have remembered that I may have some 0.5mm brass rivets that may suit. If I file the heads to the shape of the ones here, that may look passable. Having said that, after a few coats of paint have been applied, they would be hard to spot anyway.

Jon

IMG_5014.JPGIMG_5017.JPGIMG_5019.JPG
 

Jon Nazareth

Western Thunderer
Things haven't quite worked out for this wagon. My making of the springs didn't work out and so, I have used a set of Mike Williams's instead. A shame but there yer are.
Also, the sides have bowed as I went along. They started of straight but seemed to have bowed as the strapping went which is strange as it's not happened to me before. One way of trying to straighten them up that I've thought of is to pack from the inside so that the sides are as straight as I can get them and then to play a hair dryer over them to soften them up. After cooling down, they should pass muster or, that's the thinking. If anyone else can think of a way, I'd very much like to hear it.
I have got some etched diagonals but I obviously got my measurements wrong as the etched bolt holes in the etches didn't line up with the planks properly. The styrene ones will look okay once all is painted, though, I hope :).
I fitted the sheet rings today but I'm waiting for some shoulderless handrail knobs which I'll use for the door fittings and then it should be ready for an undercoat while this weather holds.

Jon

IMG_5132.JPGIMG_5134.JPGIMG_5135.JPG
 

Jon Nazareth

Western Thunderer
A similar pair of photos to the ones above but some differences.
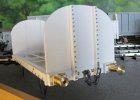
Our local sorting office is understaffed and the post has been piling up. People in the village have been complaining about not receiving post even though they know that things have been posted. I have been waiting a while for some railway stuff which all arrived on Saturday, hurrah! I was able to press on with this wagon and today, I managed to finish it off. I've fitted the half round to the tops of the sides and a strip that covers the rounded tops of the ends. I was so keen to get theses on that I forgot about the supposed opening door for one but, I did remember for the other. For the one that I forgot, I managed to saw down with a jewellers saw to create the gap and it turned out okay. I've also fitted to door retaining pins, not quite the right name but I'm sure that you know what I mean. The pin that goes through the sides is a 7mm scale shoulderless handrail knob and the pin that goes through the end to form the T is also a 7mm shoulderless knob but from a different supplier. I was pleased that that they look so well, to my eyes at least. It's a little breezey ouside but the rain has stopped and the sun has come out so, I'll give it a coat of primer this evening. In a previous post, I mentioed that I was going to have a go at straightening the bowed sides. I've decided against this as the sides are really quite stiff and I didn't want to cause any damage at this stage. When I'm gone, someone may decide to pack the sides out and hide the packing with some sort of load, who knows.

Jon

IMG_5142.JPGIMG_5143.JPG
 
Top