Crook Street Works - David Andrews Precursor

Allan

Western Thunderer
Hi All,

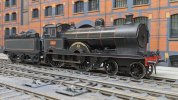
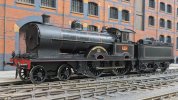
This is my first post, for those of you who also frequent the GOG forum these may have an uncanny similarity... Anyway here's a few notes on this build. I already have a George V class from David's old Javelin range and this kit is the same one that also allows the build of the original and rebuilt Precursor. For this build I want the rebuilt, superheated form - so almost identical to the George V but with separate splashers rather than a single joint one. I'd also like an original one but David's had the temerity to retire...! (Have a good one David...;)).

This one's going to be "Tamerlane" primarily because there's a photo of it at Manchester so I'm reckoning it may well have shown up at Crook Street.


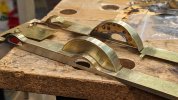
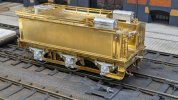
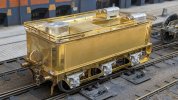
Anyway... Here's the tender - all very straightforward in typical DA style. I added the water feed pipes as the only extra.
PXL_20250212_180127929.jpg


PXL_20250212_180148052.jpg

PXL_20250212_180117270.jpg


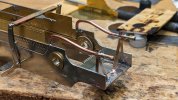
I always have trouble with the adhesive qualities of 4-4-0s so I thought I'd try and compensate this one. There's convenient equalising beams supplied in the kit so I used those, the idea being to have a floating motor/gearbox with the load-bearing fulcrum being equidistant between the drivers - the other one being the bogie pivot. Hitherto, I've built them sprung so let's see if my Grand Experiment works out...

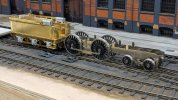
Here's the arrangements with the wheel bearings soldered to the beams and allowed to slide in slots in the frames coincedent with the axle holes

PXL_20250211_111826118.jpg


At this stage I thought I'd better build the bogie...:

PXL_20250211_111801913.jpg


And lo... I had a runner - well ok, a push-along - after I'd opened out the coupling rod holes - not because of some dimensional slack in the kit but my rubbish soldering up of the rods... :rolleyes: :

PXL_20250212_174836862.jpg

PXL_20250212_180100957.jpg


I've since tested it with a motor in and, with a tad more opening of the coupling rods, all is ok. I run DCC but prefer to test on DC as it shows up all the tight spots that the feedback DCC chips smooth out. I might furkle with the bogie mount to more accurately set the ride height rather than the as-supplied spring arrangement ....or I might do that at the end when I know how heavy and front loaded the body is, let's see.


Cheers
Allan
 

Allan

Western Thunderer
I like this I would also like a precursor but as you said they are no longer available.
John
It's a shame isn't it. Looks like I might have the joys of fretting out those footplate sides in my future at some point - I reckon that's the crux of the whole build! ...And I'll have to buy a rivetting tool...
 

adrian

Flying Squad
Thanks very much for posting those - Crook Street was very instrumental in dragging my interest into the pre-grouping era. The recent kits I've been building were very much 1950-60's era however my original introduction to 7mm was scratch building and so a desire to go back to scratch building meant I started a Precursor Tank build for something different. However like buses I started the build and 2 other builds started at the same time! Anyway I picked up the project over the Christmas holidays so will start posting updates soon and will be interested to see how you progress with this build.
 

paulc

Western Thunderer
Thanks very much for posting those - Crook Street was very instrumental in dragging my interest into the pre-grouping era. The recent kits I've been building were very much 1950-60's era however my original introduction to 7mm was scratch building and so a desire to go back to scratch building meant I started a Precursor Tank build for something different. However like buses I started the build and 2 other builds started at the same time! Anyway I picked up the project over the Christmas holidays so will start posting updates soon and will be interested to see how you progress with this build.
One of these ? This was my first scratch build as well .17399279228551270077346.jpg
 

Allan

Western Thunderer
Hi All,

Inching along quietly...

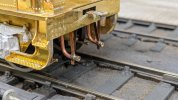
Added a couple of extras to the chassis. First of all, an ashpan front with damper linkage:

PXL_20250215_112402673.jpg


...And some water feed pipes, which are quite long on these engines:

PXL_20250215_160718468.jpg


Added the various bits and bobs in the kit and the chassis is looking complete. No inside Joy valve gear for me I'm afraid, I kid myself that I can retrofit it later but at the moment my priority is to get operating locos.

PXL_20250220_120232681.jpg


PXL_20250220_174042736.jpg


I then made a start on the footplate, always a bit tricky on LNW engines with their curved valances which also have to follow the profile of the splashers - lots of checking, checking and then some checking.

PXL_20250217_153816575.jpg


PXL_20250219_160411582.jpg


So far so good...

Cheers
Allan
 

PeterM

Active Member
Thanks for posting on here Allan. As an LNWR modeller (well LNWR/GWR joint line actually) I am an avid viewer of the Crook Street videos on YouTube. I have a 4mm Precursor from Brassmasters but it struggles with my 35" curves which are tad too tight for P4. The Experiment, also from Brassmasters, does run though!

According to the information I have, Tamerlane was allocated to Longsight (16) in 1912 and (as rebuilt) in 1917 it was at Crewe (15)
 

Allan

Western Thunderer
Hi All,

A bit of a delayed report, I was just going to do a little more before posting and then the weather got good and the hills were calling...


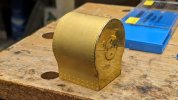
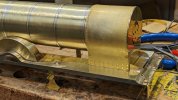
At this point I thought I'd best solder up the boiler, supplied pre-rolled but a little extra curve is needed to be imparted to the butt jointed edges underneath. With all that done, the firebox was fettled into shape around some gas pipe, ensuring it fitted the splashers:

PXL_20250224_152139733.jpg


Then the smokebox assembled, ensuring all was square:

PXL_20250225_120801006.jpg


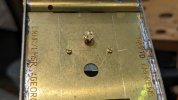
I like to make the boiler detachable for painting and particularly lining so I fitted a false floor and drilled holes in the footplate so it can be screwed on, not forgetting corresponding clearance holes for the bolt heads in the chassis cross-member:

PXL_20250225_173830714.jpg

PXL_20250225_173852923.jpg


So far all is behaving itself:

PXL_20250226_125817010.jpg


I returned to the footplate and added a few more bits and bobs. Missing is the sanding gear - this is what I wanted to get done before posting but it's still waiting...(the pesky weather is still good...!):

PXL_20250227_140628918.jpg


Finally, I folded the front valve inspection cover, I'll probably glue this on later, I'm not confident I won't unsolder all those hinges if I try and solder it on:

PXL_20250227_140642192.jpg


That's all for now. Cab next - after that sanding gear...

Cheers
Allan
 

Allan

Western Thunderer
Hi All,

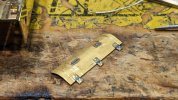
Got the sanding gear done. I forgot to mention the splasher mounting plates which, unusually for DA kits, weren't included but are fairly prominent so I made some up and added them:

PXL_20250307_095513125.jpg


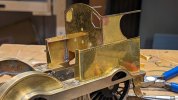
On to the cab which went together straightforwardly. I did notice some movement when the boiler was fitted so I beefed up the solder around the base of the front cab extensions. These pics show it with the chassis and a pair of wheels in place to check clearances:

PXL_20250310_155851278.jpg


PXL_20250310_155906564.jpg


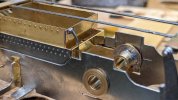
I added the rear sanding gear and then returned to the boiler to position and fit handrail knobs to the longitudinal pipes - just held in position in this photo as I'll fit them post painting to ease lining of the boiler. There's a pipe to be fitted from the cab and over the splasher to dissapear between the frames, I'm afraid to say I don't know what it's for but I suspect it may be vacuum brake related as it comes from that side of the cab. Both Georges and Precursors had them.:

PXL_20250313_160147309.jpg


That's most of the sheet brasswork done but there's a fair bit of fiddly-diddly stuff to go yet (which I quite enjoy, actually...)


Cheers
Allan
 

LarryG

Western Thunderer
Your construction is clean and square. I built a number of the latterday versions in 00 using GEM kits as a basis, and happened to pee off George Mellor off by showing him one in LMS crimson lake. As if matters couldn't get any worse, I then took a Belpaire version along to the factory!
 

Allan

Western Thunderer
Your construction is clean and square. I built a number of the latterday versions in 00 using GEM kits as a basis, and happened to pee off George Mellor off by showing him one in LMS crimson lake. As if matters couldn't get any worse, I then took a Belpaire version along to the factory!
Clearly, a sacrilegious act...;) I remember those GEM kits, about 5 components if my memory serves me well, and not a rivet to be seen! Ah, we were grateful in those days...!
 

Allan

Western Thunderer
Hi All,

I fitted the handrails just to test it all fits:

PXL_20250314_122031588.jpg


...and the mystery yet visible pipe:

PXL_20250314_150149291.jpg


...and also the vacuum brake pipery in front of the cab - this too will be fixed after painting:

PXL_20250315_100522593.jpg


Lastly, I added the four visible rivets on the firebox cladding sides:

PXL_20250315_151638341.jpg


Returning to the footplate, I beefed up the reach rod to look like a clevis as this again is very visible and the supplied etch is somewhat 2D:

PXL_20250316_152129235.jpg


To complete the external work, the boiler fittings were glued on - starting to look like an engine now...:

PXL_20250317_092128776.jpg


I'm in the throes of making a Crook Street movie at the moment so a bit of a pause on Tamerlane but the cab interior is next.


Cheers
Allan
 

Allan

Western Thunderer
Hi All,

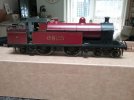
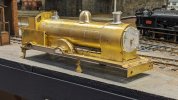
With quite a hiatus with all the good weather, I've finally finished it. I now realise I didn't take any photos of the cab interior prior to painting.

I decided to obtain a different gearbox to provide better clearance under the cab. On my George V (apart from the splashers, the same engine) I cut a space in the cab floor but, given I have lots more engines to build I reckoned it was easier to just replace the motor/gearbox. So haulage trials are yet to take place and, as it's a 4-4-0, I suspect some lead puddling will be required.


PXL_20250426_074029540a.jpg


PXL_20250426_074109437a.jpg


PXL_20250426_074326186a.jpg


PXL_20250426_074520933a.jpg


That concludes this build. Out of interest, it took me 195 hours over 13 weeks, longer than my Renown - I seem to be getting slower...


Cheers
Allan
 

simond

Western Thunderer
I’ve never counted, but I do recall that the local crew were quite impressed that I could build two locos per year, when I first found the joys of kit loco building.

13 weeks suggests you could do four in a year, so I’d not be worrying much about slowing down.
 
Top