
You are using an out of date browser. It may not display this or other websites correctly.
You should upgrade or use an alternative browser.
You should upgrade or use an alternative browser.
B1 - 61161
- Thread starter Dave Holt
- Start date


Dave Holt
Western Thunderer
Thanks everyone for the good wishes. Much appreciated on my road to recovery.
I've now attached the platform support brackets to the frames with their position being dictated by the filler spouts locating in holes in the foot plate. The brackets locate the top end of the rear sand pipes. Printed sand boxes fit on the stubs of the fillers but need a slight design change and a re-print. The operating rod has been fixed on the RHS for the ash pan mechanism.
Getting there.
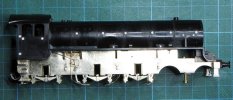
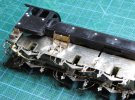

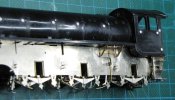
Dave.
I've now attached the platform support brackets to the frames with their position being dictated by the filler spouts locating in holes in the foot plate. The brackets locate the top end of the rear sand pipes. Printed sand boxes fit on the stubs of the fillers but need a slight design change and a re-print. The operating rod has been fixed on the RHS for the ash pan mechanism.
Getting there.
Dave.
Last edited:
Dave Holt
Western Thunderer
As far as I can tell, the fitting of a small casting has completed construction of the chassis. The casting in question represents the blowdown valve fitted just above the firebox foundation ring on the LHS. Ut is a brass casting intended for use on Dave Bradwell's K1 kit, but the exact same valve was used on B1s.
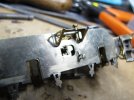
I've fitted it with the operating spindle vertical, Hope that's correct as I haven't got any prototype photos that clearly show the valve.
I could now paint the chassis components and re-assemble or could start the detailing work on the body. Mmmmm.
Dave.
I've fitted it with the operating spindle vertical, Hope that's correct as I haven't got any prototype photos that clearly show the valve.
I could now paint the chassis components and re-assemble or could start the detailing work on the body. Mmmmm.
Dave.
As far as I can tell, the fitting of a small casting has completed construction of the chassis. The casting in question represents the blowdown valve fitted just above the firebox foundation ring on the LHS. Ut is a brass casting intended for use on Dave Bradwell's K1 kit, but the exact same valve was used on B1s.
View attachment 264276
I've fitted it with the operating spindle vertical, Hope that's correct as I haven't got any prototype photos that clearly show the valve.
Do these help?


61182 and preserved 1306 respectively.
Simon
Hi Morgan,
I think its the 'blower elbow' on mould 24. Or at least I have fitted something to my J39, and I had moulds 23, 24 and 1.
That said the blower elbow could be the ejector fitting on the smokebox. But those are the moulds I have, and there is a photo on my S4 forum topic of what I fitted.
J39 64859 Bachmann/Dave Bradwell - Page 5 - Scalefour Forum
I'm looking forward to the body detailing Dave.
Cheers,
Pete
I think its the 'blower elbow' on mould 24. Or at least I have fitted something to my J39, and I had moulds 23, 24 and 1.
That said the blower elbow could be the ejector fitting on the smokebox. But those are the moulds I have, and there is a photo on my S4 forum topic of what I fitted.
J39 64859 Bachmann/Dave Bradwell - Page 5 - Scalefour Forum
I'm looking forward to the body detailing Dave.
Cheers,
Pete
Dave Holt
Western Thunderer
Thanks for the photos and comments.
The blowdown valve is indeed a casting from sprue 22.
Like both you and Peter, I'm a bit unsure about Dave's "blower ellbow" and tend to agree it's meant for the ehd of the ejector exhaust pipe, which probably would be the same as on a J39.
Dave.
The blowdown valve is indeed a casting from sprue 22.
Like both you and Peter, I'm a bit unsure about Dave's "blower ellbow" and tend to agree it's meant for the ehd of the ejector exhaust pipe, which probably would be the same as on a J39.
Dave.
Dave Holt
Western Thunderer
The printed revised sand boxes arrived today and have been cleaned up and attached to their mountings. In my view, they campare quite favourably with the prototype photo posted abovr. I think this does actually finish the chassis, so I can start to think about painting it as well as moving on to the body.
Here are the boxes in place.
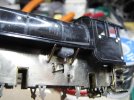
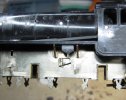
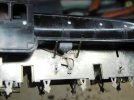
Dave.
Here are the boxes in place.
Dave.
Dave Holt
Western Thunderer
A friend has posted about the use of the smokebox door I had made on his J39 model, so here is mine for the B1.
Also shown, for comparison, is the replacement Dave Bradwell door I originally intended to fit and which was correct for my loco when built. However, photos of the loco in the period modelled showed that by then the loco carried one of the boilers from the first ten locos, with the smaller diameter, shallower door. Hence the printed commission.
As you can see, I'd already fitted the Bradwell door with his nicely cast dart handle and an etched lamp iron before I discovered I needed the other type of door.


The number plate mount is sized to suit the etched plate that Rumney models is producing for me.
Dave.
Also shown, for comparison, is the replacement Dave Bradwell door I originally intended to fit and which was correct for my loco when built. However, photos of the loco in the period modelled showed that by then the loco carried one of the boilers from the first ten locos, with the smaller diameter, shallower door. Hence the printed commission.
As you can see, I'd already fitted the Bradwell door with his nicely cast dart handle and an etched lamp iron before I discovered I needed the other type of door.
The number plate mount is sized to suit the etched plate that Rumney models is producing for me.
Dave.
Dave Holt
Western Thunderer
Productivity has nosedived in this very warm weather, but a start has been made fitting the hand rails.
I'm not sure I'm doing the body detailing in a sensible sequence bit I decided to start with the cab side hand rails. From the scale drawings, it appeared that the original knobs were not necessarily in exactly the right place so, after filling the existing, oversize holes, new ones were drilled with the aid of a thin N/S drilling jig. The knobs used are Gibson short type. I found a pack where the flange at the base has been machined quite thin, unlike some others, which needed 0.9 mm holes for the shanks.
Here are both sides with the rails fitted. Hope they don't get damaged in further handling.


May well move on to the boiler next. I am wondering about re-using the Bachmann RTR rail as it is nicely bent to the correct shape, but is 0.5 mm diameter rather than the scale 0.45 mm. Will the difference be noticeable?
Previously, I showed the etched cab floor/reverser stand made up from Justin's etches. Whilst it fitted inside the cab nicely, I hadn't allowed for the chassis frames protruding though the cab floor, so a modified design has been initiated. In the mean time, I un-soldered the vertical pieces that interfered and re-fitted the floor, which sits quite nicely, as seen below.

I will now use just the revised vertical pieces (which are cut out to clear the frames) to complete the revised floor.
Dave.
I'm not sure I'm doing the body detailing in a sensible sequence bit I decided to start with the cab side hand rails. From the scale drawings, it appeared that the original knobs were not necessarily in exactly the right place so, after filling the existing, oversize holes, new ones were drilled with the aid of a thin N/S drilling jig. The knobs used are Gibson short type. I found a pack where the flange at the base has been machined quite thin, unlike some others, which needed 0.9 mm holes for the shanks.
Here are both sides with the rails fitted. Hope they don't get damaged in further handling.
May well move on to the boiler next. I am wondering about re-using the Bachmann RTR rail as it is nicely bent to the correct shape, but is 0.5 mm diameter rather than the scale 0.45 mm. Will the difference be noticeable?
Previously, I showed the etched cab floor/reverser stand made up from Justin's etches. Whilst it fitted inside the cab nicely, I hadn't allowed for the chassis frames protruding though the cab floor, so a modified design has been initiated. In the mean time, I un-soldered the vertical pieces that interfered and re-fitted the floor, which sits quite nicely, as seen below.
I will now use just the revised vertical pieces (which are cut out to clear the frames) to complete the revised floor.
Dave.

45609
Western Thunderer
Hi Dave,
It is a bit hot for doing much at the modelling bench. Regarding the handrail I have reused the Bachmann boiler handrail on my J39. As you say, on the up side, it is accurately formed but slightly over scale at 0.5mm. However the handrail knob balls are also overscale and my justification is that the relative proportions of the ball to wire diameter are better if you use 0.5mm wire. I also recall that Mike Edge use 0.5mm wire on his 4mm scale builds. The other option is do a lot of fettling of the knobs to try and reduce the ball diameter. Life is a bit short for that IMHO. Another mitigation is to just blacken the handrail wires and only fit them permanently after the loco is painted but before weathering. You’re then not adding a thickness of paint to the wire which is always tricky to work around when painting the model anyway. Again, this is the approach I’m taking on the J39.
Cheers…Morgan
It is a bit hot for doing much at the modelling bench. Regarding the handrail I have reused the Bachmann boiler handrail on my J39. As you say, on the up side, it is accurately formed but slightly over scale at 0.5mm. However the handrail knob balls are also overscale and my justification is that the relative proportions of the ball to wire diameter are better if you use 0.5mm wire. I also recall that Mike Edge use 0.5mm wire on his 4mm scale builds. The other option is do a lot of fettling of the knobs to try and reduce the ball diameter. Life is a bit short for that IMHO. Another mitigation is to just blacken the handrail wires and only fit them permanently after the loco is painted but before weathering. You’re then not adding a thickness of paint to the wire which is always tricky to work around when painting the model anyway. Again, this is the approach I’m taking on the J39.
Cheers…Morgan
I am wondering about re-using the Bachmann RTR rail as it is nicely bent to the correct shape, but is 0.5 mm diameter rather than the scale 0.45 mm. Will the difference be noticeable?
I don't think it does, Dave. I think yours has the "ugly" version round the s.box door (no reverse curve) - at least this seems to suggest so:

British Railways Steam 1948 -1968 | Thompson B1 class 4-6-0 No 61161, photographer unknown. | Facebook
Thompson B1 class 4-6-0 No 61161, photographer unknown.
 www.facebook.com
LNER handrails are easy enough to do anyway - you know the trick about creating two halves and joining them inside the top handrail knob, I expect?
45609
Western Thunderer
Having just had a look through a couple of books it looks like most, if not all, B1’s had the “ugly” handrail as @Daddyman describes it. I then dug out a Replica B1 body that I have and there is definitely a difference. It’s also made me look more closely at J39 photos and the reverse curve on these doesn’t seem to be as pronounced as the Bachmann handrail. I think I can live with it though.