
You are using an out of date browser. It may not display this or other websites correctly.
You should upgrade or use an alternative browser.
You should upgrade or use an alternative browser.
Scattergun 3.5” King Arthur ‘Sir Sagramore’
- Thread starter Tim Watson
- Start date


Tim Watson
Western Thunderer
I do, Michael. It is a bit formulaic for his particular design but with a bit of luck I might be able to make something workable. The combining cone is the main missing component.Hi Tim do you have D.A.G. Brown's book Miniature injectors inside and out? It really is a great treatise on model injectors.
Michael
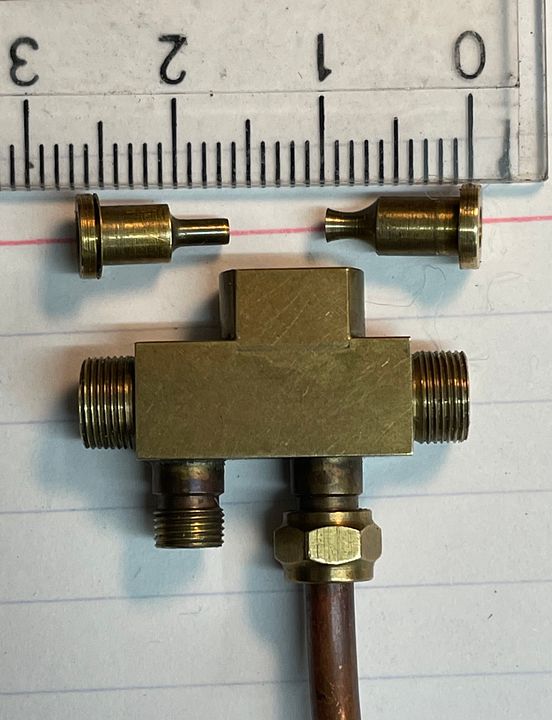
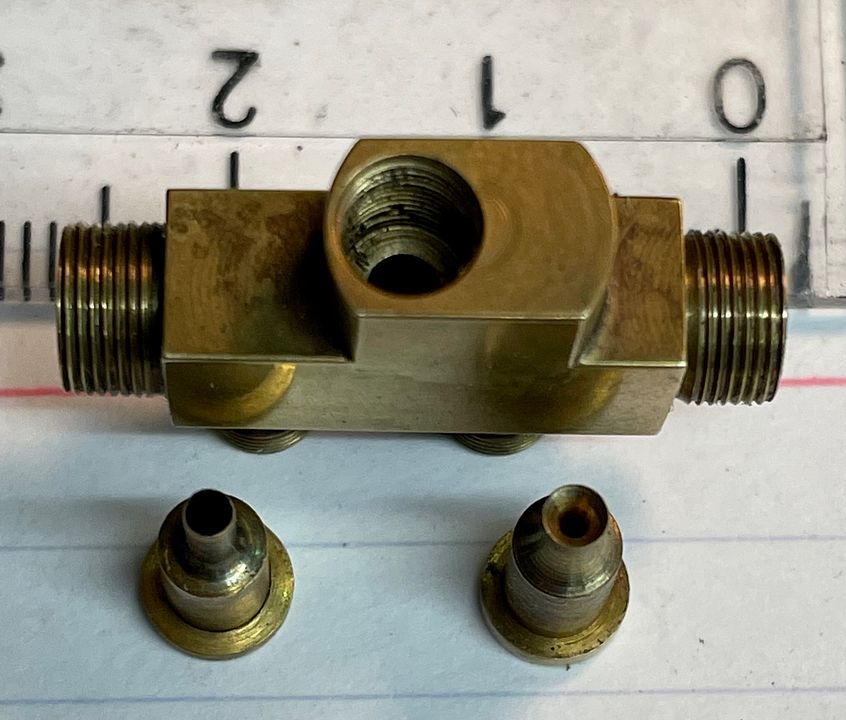
There is an awful lot of other plumbing and fittings to be made before I get on with it.
Tim

Tim Watson
Western Thunderer
Attention has now turned to the steam supply to the oil reservoir of the sight feed lubricator. This pipe was roughed out for shape with some thick electrical single core cable.
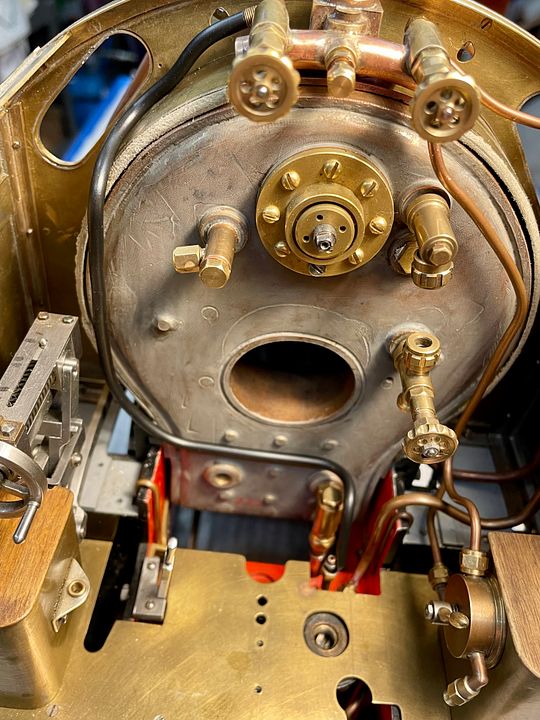
The actual pipe was made in two halves with the little globe valve in the middle. The bending was done by hand with frequent annealing.
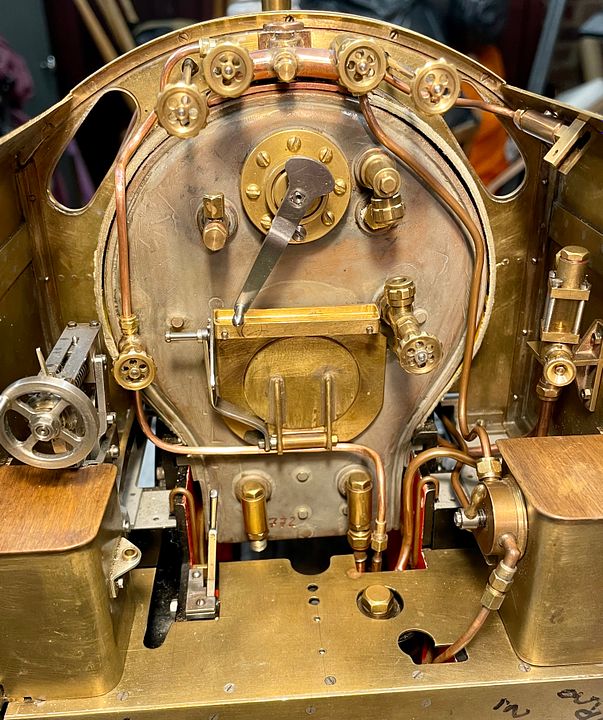
I couldn’t resist putting in place some of the other fittings. The backhead will have a false cover, to which will be attached the firebox door, pressure gauge, and injector steam valves. The round head bolts on the regulator gland will be replaced with something more appropriate.
Tim
The actual pipe was made in two halves with the little globe valve in the middle. The bending was done by hand with frequent annealing.
I couldn’t resist putting in place some of the other fittings. The backhead will have a false cover, to which will be attached the firebox door, pressure gauge, and injector steam valves. The round head bolts on the regulator gland will be replaced with something more appropriate.
Tim
Last edited:
Tim Watson
Western Thunderer
After a few hours work a 1” pipe now links up the blower valve with the boiler hollow stay. Not exactly greased lightening progress, but making all the fittings takes a bit of time.
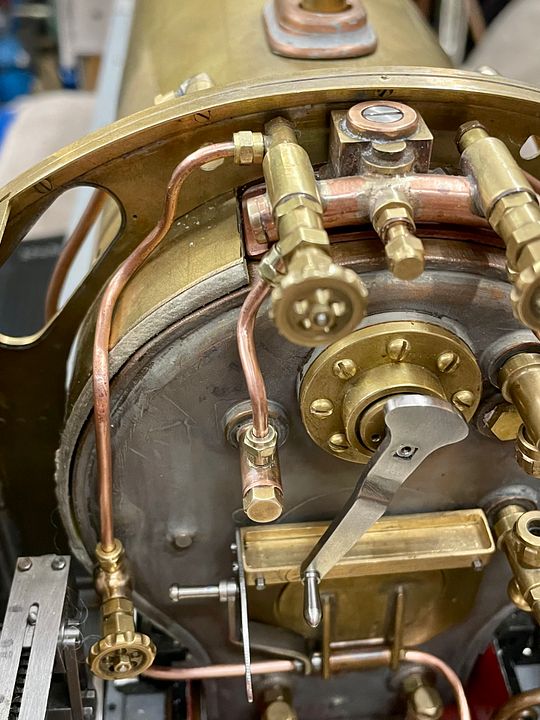
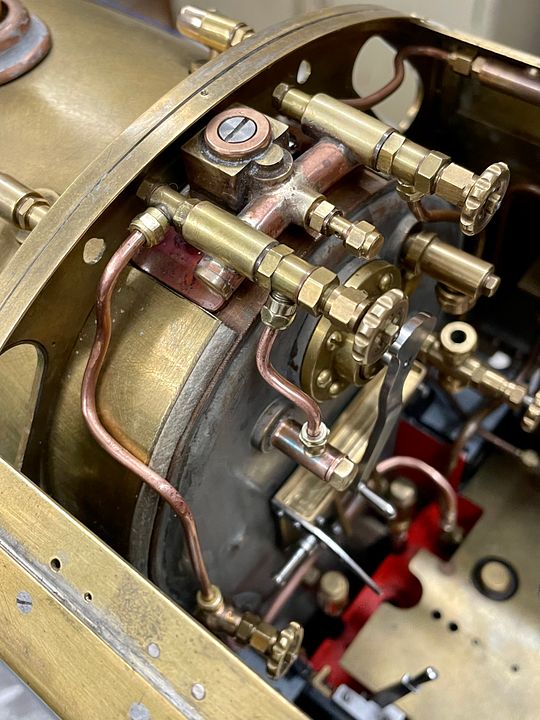
I think the back head cleading will probably follow - that should be fun.
Tim
I think the back head cleading will probably follow - that should be fun.
Tim

michael mott
Western Thunderer
Nice to see such clean progress Tim, and it all functions as well.
Michael
Michael

Dangerous Davies
Western Thunderer
+1 for D A G Brown's book on injectors!
Tim Watson
Western Thunderer
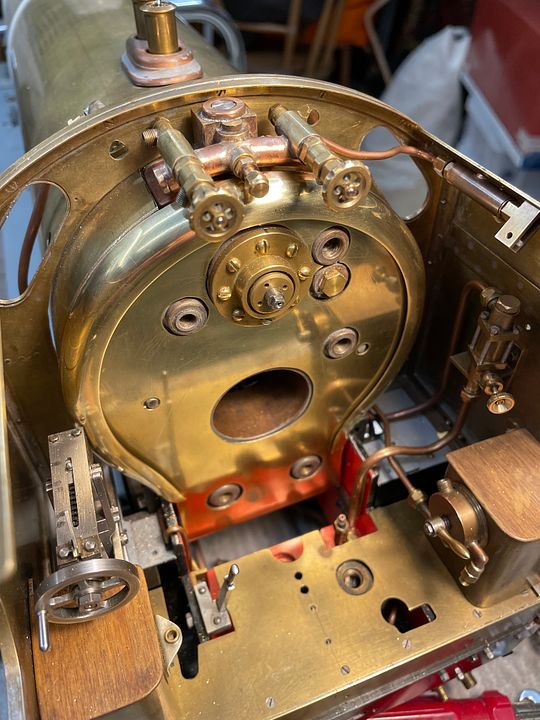
The back head cleading was initially sketched out using a paper template.
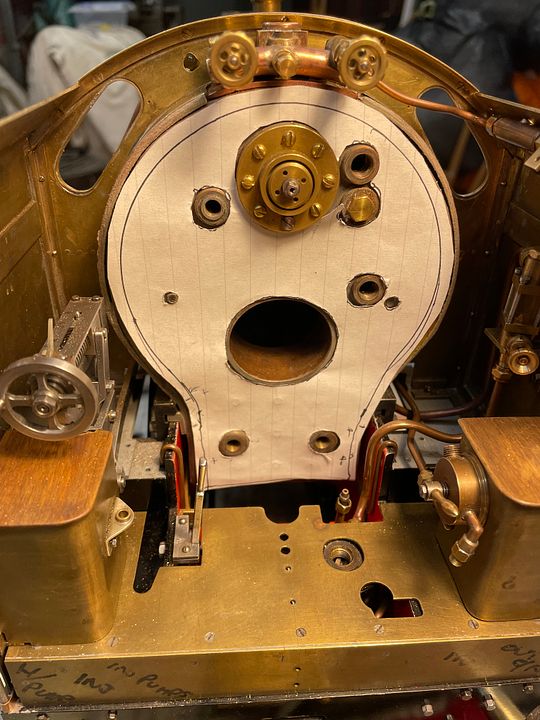
This was then transferred to 0.6mm thick brass and cut out using a dental engine, a diamond disc and TC trimmers.
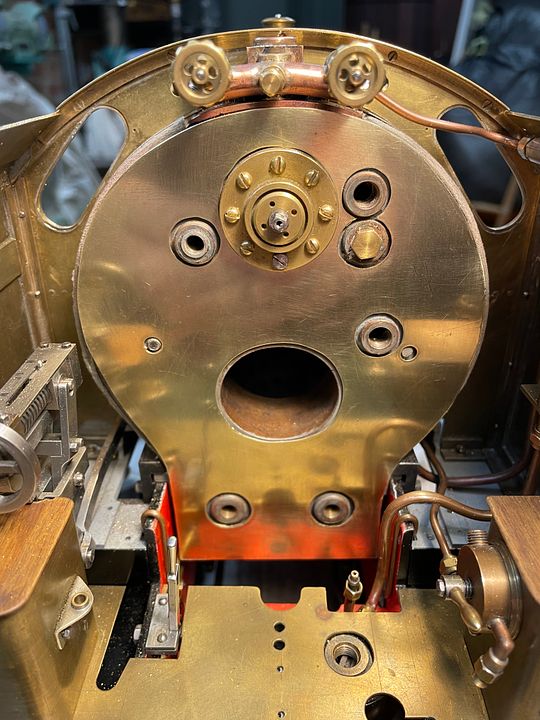
Ian Jaycroft made a superb quarter-round brass bezel.
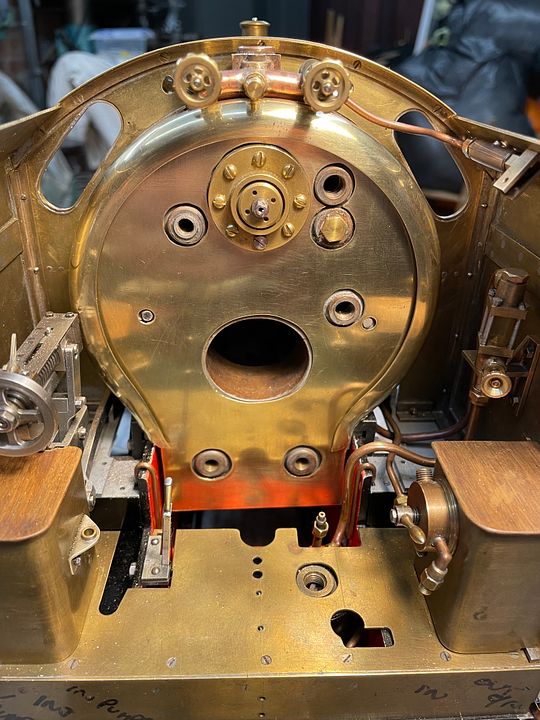
The two components will be soldered together to make a more solid structure, so that there aren’t any gaps. The firebox door assembly (visible in the previous posts) will be bolted through the cleading.
Tim
This was then transferred to 0.6mm thick brass and cut out using a dental engine, a diamond disc and TC trimmers.
Ian Jaycroft made a superb quarter-round brass bezel.
The two components will be soldered together to make a more solid structure, so that there aren’t any gaps. The firebox door assembly (visible in the previous posts) will be bolted through the cleading.
Tim
Tim Watson
Western Thunderer

There is a similarity…
Tim
Tim Watson
Western Thunderer
I have had a busy few days working on the back head for Sir Sagramore. I decided to use 16BA bolts to secure the quarter round-bezel to the cleading rather than soldering: much more controllable. The firebox door assembly was also bolted on. The restraining bracket for the door arm will probably be beefed up a bit - I don’t think it will otherwise survive my poor aim when firing…
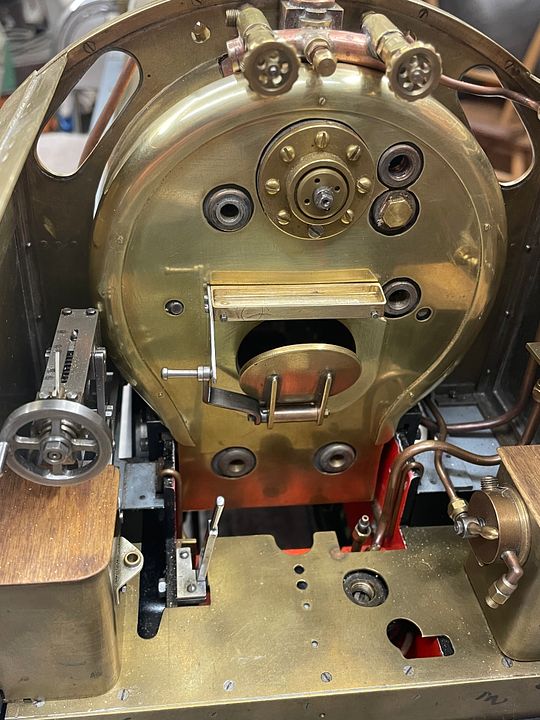 .
.
The cleading was fixed to the back head with a couple of short 10BA bolts into some stays. This then allowed for the pressure gauge and LH injector steam valve spindle mounting to be attached using 14BA slotted screws (I might change these to hex bolts).
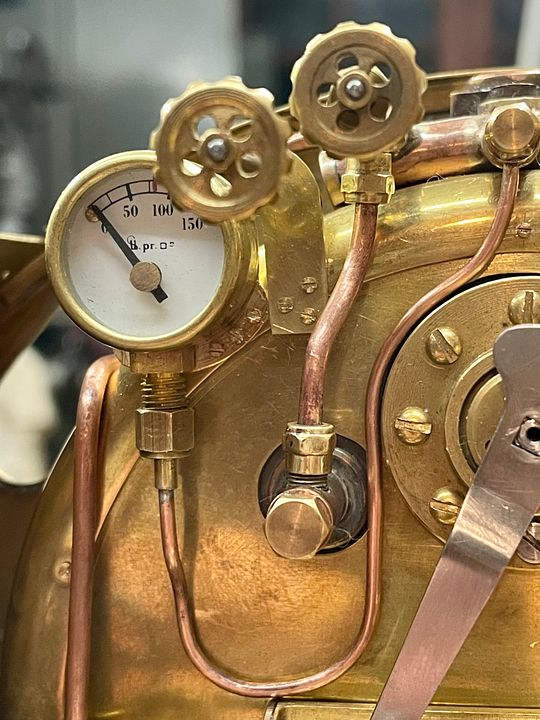
The routing of all the pipes is a real snake’s wedding.
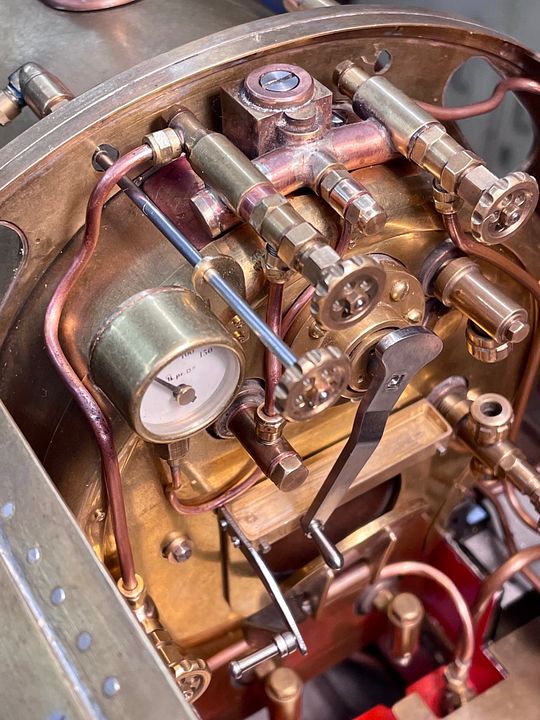
Other than a few small jobs, it just needs the RH injector valve spindle support making and some restraining collars on the shafts to more or less complete the top end fittings.
Tim
. The cleading was fixed to the back head with a couple of short 10BA bolts into some stays. This then allowed for the pressure gauge and LH injector steam valve spindle mounting to be attached using 14BA slotted screws (I might change these to hex bolts).
The routing of all the pipes is a real snake’s wedding.
Other than a few small jobs, it just needs the RH injector valve spindle support making and some restraining collars on the shafts to more or less complete the top end fittings.
Tim
michael mott
Western Thunderer
Meticulous work Tim, it looks grand, worth all the effort for sure.
Michael
Michael
Tim Watson
Western Thunderer
Thank you Michael & JB for the kind comments. Don’t forget this is a relatively large engine so it makes the fiddly bits a good deal easier to handle. Finishing this engine has caused me to have a lot more respect for our model engineering colleagues and the compromises that are needed, especially in 1/16 scale.
Tim
Tim
Last edited:

Tim Watson
Western Thunderer
Indeed, Giles, it will be run. I don’t make shelf queens. The boiler number is both on the side of the dome and close to the foundation ring at the back. That one is currently covered up.
Tim
Tim
Last edited:
Tim Watson
Western Thunderer
Not at all, Giles. I am on a steep learning curve on this miniature engineering stuff. Fortunately, I have some excellent mentors in the NLSME.
Tim
Tim
Tim Watson
Western Thunderer
Herewith, the boiler number engraved on the side of the dome. It was the number of the original engine name, chosen at the time of the boiler 2x pressure test, but as a quirk it is now one out, as Sir Sagramore is / was number 771.

Sorry to be a bit of a broken record but the cab of Sir Sagramore has now got to a stage where the top end is virtually complete (and I need a break from plumbing). Just need to tighten up a few screws and move on to a larger scale interlude this weekend.
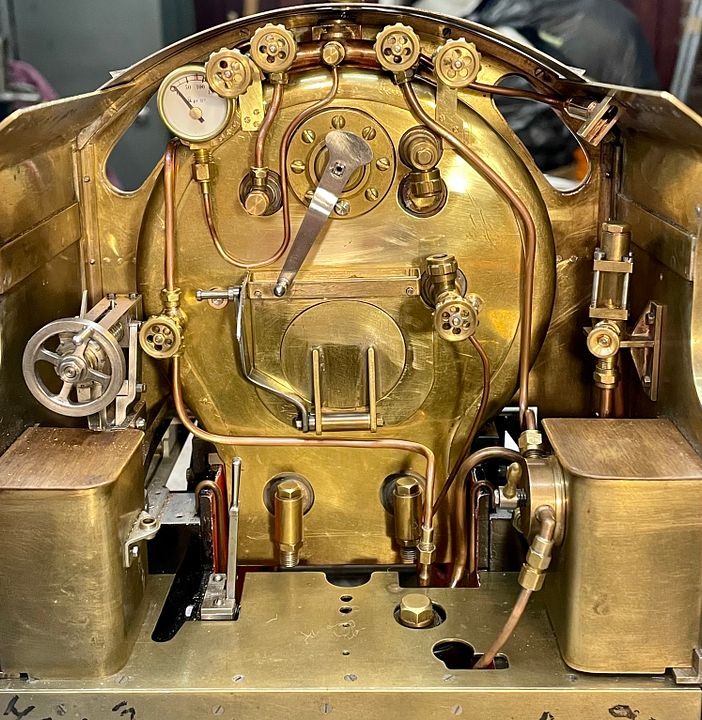
Replacing the front section of the cab improves the appearance considerably.
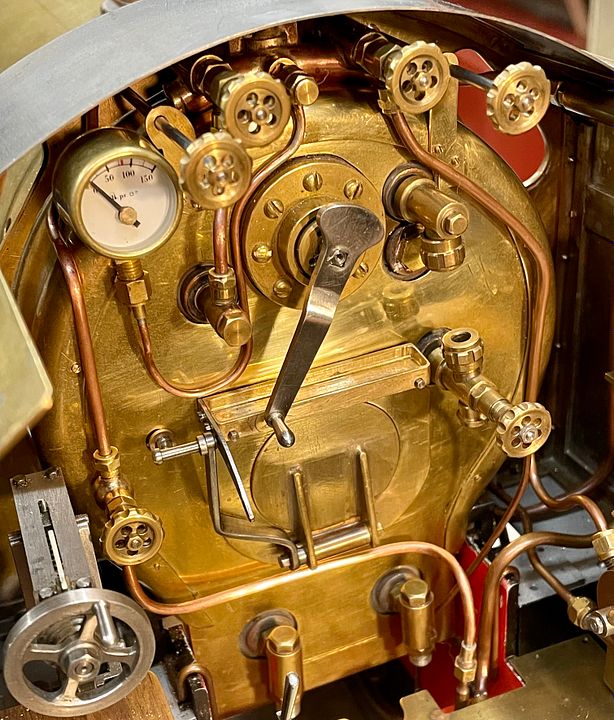
Tim
Sorry to be a bit of a broken record but the cab of Sir Sagramore has now got to a stage where the top end is virtually complete (and I need a break from plumbing). Just need to tighten up a few screws and move on to a larger scale interlude this weekend.
Replacing the front section of the cab improves the appearance considerably.
Tim
michael mott
Western Thunderer
That does look pretty spiffy!
1/16th scale is such a nice scale to work in though.
Michael
Finishing this engine has caused me to have a lot more respect for our model engineering colleagues and the compromises that are needed, especially in 1/16 scale.
1/16th scale is such a nice scale to work in though.
Michael
Tim Watson
Western Thunderer
Fully agree, Michael. It’s possible to manhandle the loco quite easily, whereas 5” gauge (1/12 scale) can get very heavy for an equivalent engine.That does look pretty spiffy!
1/16th scale is such a nice scale to work in though.
Michael
A gratuitous ‘arty’ shot for good measure, with Sir Sagramore back indoors.

Tim
Last edited: