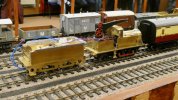
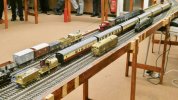
The Heybridge Railway, 1889 to 1913

Richard Gawler

Western Thunderer
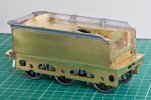
I have made a start on the chassis for the tender so I can get an idea of how the finished model is going to look. This is the third sub assembly for the model.

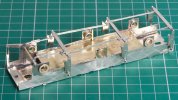
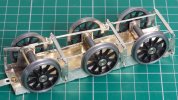
The chassis is a “model chassis” (I mean, not a prototypical chassis) in that it sets the wheels running in internal not external bearings. Nevertheless I have tried to make the result look a bit less unrealistic by shortening the frame spaces so they don’t extend below the axles. I have used two of the four frame spaces provided in the kit and put a strip of brass along the bottom of the frames to keep the assembly rigid.
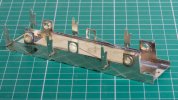
DSC_0946.jpg
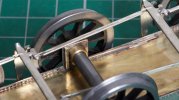
The kit builds up into a rigid chassis with the middle axle set about 1/4 mm higher than the other two. I managed to lose most of this 1/4 mm when I opened up the holes in the frames to accept the wheel bearings, so suitably inspired by work elsewhere on WT I have elongated the holes and provided some springs from phosphor bronze wire, 0.5 mm diameter. The design of these springs was a total guess but they seem to work fine. The wheels have movement of about 0.5 mm downwards and most of 1 mm upwards, probably more than they really need.
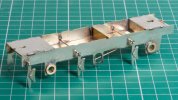
DSC_0951.jpg
I am pleased with the appearance of the brake blocks. The loco will not have brakes so I used the brake blocks supplied for the loco as packing underneath the brake blocks for the tender. I think this gives the brake blocks a bit more depth and they look as though they are separate parts and not just stamped out as one piece with the hangers.

The partition across the width of the chassis makes a compartment at the front to hold a piece of lead. The idea is to shift the centre of gravity forwards; otherwise, almost all of the weight of the tender is coming from the battery pack sitting above the rear axle. I realise that 7mm of lead may well ruin the performance of the radio receiver above it but I can only try and see how well things work out. I could put some lead into the sides of the body near the front instead. I am rather hoping the receiver will receive all the radio waves it needs through the holes and slots above its on-board aerial.
 

simond

Western Thunderer
Why do you want to add weight to the tender?

As long as the CoG is actually within the rectangle of the bearings, I doubt it’ll ever be a problem. (And if it isn’t, it‘ll fall over when you put it down!)
 

Richard Gawler

Western Thunderer
A quick look at the scales suggests the model will top out at about 320 grams (not including any lead) and the C of G is going to be about mid-way between the middle and rear axles.

I'm not sure what to expect when the tender runs on the track . . . I am imagining, the model will run more smoothly, and the middle axle will follow variations in the track more predictably, if the C of G is nearer the middle i.e. closer to being above the middle axle. Maybe, if the model is being propelled over the club track with its bumps and gaps then having the C of G fairly central will help. Then again, with both outer axles running in rigid bearings, and the battery pack wedged into place to stop it moving around, perhaps there is indeed nothing to gain.
 
Last edited:

Richard Gawler

Western Thunderer
the basic formula is simple - T= R-(R^2 - (W/2)^2)^0.5

R is the curve Radius
W is the rigid Wheelbase
T = the Throw at the mid-length of the rigid wheelbase.

(halve the wheelbase and square it, subtract that from the square of the curve radius, and then take the square root. Subtract that from the curve radius to get the throw)

This will get you close enough. The wheel diameter does make a difference, but not much. If I'm worried, I simply cut a section of the wheels at rail top level, and see whether the flanges and rails are intersecting. I'm pretty sure it's not worth the CAD time.

If the radius is around 1800mm, the throws are typically quite small - less than a millimetre, and the clearance in 0F is quite large so it'll probably not be an issue. Tighter radius, more throw, of course. The Peco Settrack point I put in at John's earlier in the year is 1028mm rad, and that gives 2.5mm of throw on a 14' wheelbase loco - which doesn't work!

If you're running on 0MF (31.5) then the clearances will be tighter and you might need some side play on a middle axle. S7, more so again.

Obviously, gauge widening is also an option (and one the real thing used)

View attachment 171856
I have made a spreadsheet and the results tally with what I have found so far and expect to find.

Here is Simon's formula to paste into Excel:
=B3-SQRT( (B3^2) - (B4/2)^2 )
supposing B3 holds the radius and B4 holds the wheelbase.

I am thinking, the throw (T) is the lateral movement needed in one direction or the other. So the total free play needed on the middle axle is 2 x T?

(this assuming the wheelbase has three axles equally spaced)

Nick I think your locos are marvellous and I hope the diversion with sideplay I have created is short-lived and/or bearable.

One thing I do know is, the tender is going to run through a Setrack curve (32 mm gauge) without difficulty.

I have arranged the outer axles with only enough play to let them turn freely, and the middle axle with about 1 mm each way i.e. 2 mm total. This 1 mm tallies with the 0.9 mm suggested by Simon's formula. I suspect the Setrack curve will be too tight for an attached Y14 so I might be building a new test track. I hope my layout gets more gentle curves.
 

Richard Gawler

Western Thunderer
DSC_0958.jpg
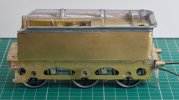
There is plenty of detail work still to do on the tender but I am pleased (and relieved) to show, the three subassemblies do fit together. The hairline gap visible here below the side at the back will disappear when the fixings are tightened up.

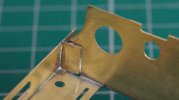
My only real curse is the outer frames. These are Alan Gibson parts for an early S23 tender, I am using these in place of the later-pattern ones supplied in Big Jim’s kit. The frames have ended up with the various cutouts on one most of a millimetre ahead of the cutouts on the other. So I can slide the chassis forwards or backwards to get the axles to line up with one frame or the other but not both at the same time.

I expect I will settle for being a bit adrift on both sides. I have a feeling, if I take a frame off I won’t get it back on as neatly.
 

Richard Gawler

Western Thunderer
I expect I will settle for being a bit adrift on both sides. I have a feeling, if I take a frame off I won’t get it back on as neatly.

I couldn't live with it. Fortunately, one skill I am developing really well is the use of the torch to dismantle brass assemblies.

I will make a guess, the cause of the problem was when I shortened the frames to make them fit. Most likely I took material off opposite ends instead of the same ends. The cutouts in the frames are not identical but the worst discrepancy is maybe 0.2 mm not 1 mm.

DSC_0973.jpg
The evidence will remain forever, but I doubt anyone will notice except me.

I am now in a happier place because I have three sub assemblies for the tender and I can add their remaining details.
 

Richard Gawler

Western Thunderer
DSC_0994.jpg
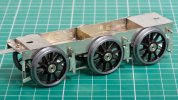
Going back to the tender chassis . . . all of this kit is going together really well but the brake rigging especially seemed to fit like a dream.

DSC_1002.jpg
The springing I have arranged on the middle axle works fine, but next time I would attach the vertical brass rod first and then file down the axle bush to fit. I think this would let me make a for a closer alignment between rod and bush. The spring is phosphor bronze wire, 0.5 mm diameter.

DSC_1000.jpg
I have reinforced all of the brake rods with lengths of nickel silver wire on the inside to make the brake rigging more robust. I think this was worthwhile, the wire doesn't show from usual viewing angles but perhaps some flat strips would have been more elegant.

DSC_1018.jpg
So - this is my first tender chassis:drool:

It is also my first model with nickel silver etchings . . . it runs really smoothly (and doesn't rock on its diagonal) and hopefully I can call it finished.

The space between the frames might be useful if I cannot squeeze all of the r/c equipment and its wiring into the body. The brass spacer near the letter C is adding some strength to the assembly but I could move this if I have to. I am very much making up the arrangement of the r/c install as I go along.
 

Dog Star

Western Thunderer
I like the overall appearance of the underframe, particularly the neat approach to hiding the springing of the centre axle. The etch parts for the brake pull rods suggest that the intended assembly ought to be for equalised brakes whereas what you have is pull through (with lost motion). Are there parts left over? Were all parts included on the etch?

regards, Graham
 

Richard Gawler

Western Thunderer
Well!!

I followed the kit instructions to build the brake rigging, and I have no parts left over.

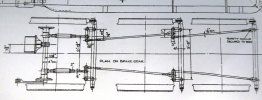
Nevertheless, the GERS drawing L46, where I am now studying the brake rigging for the first time, shows similar cross-wise parts but a completely different arrangement of the pull rods.

P1040704.JPG

I would like to leave this discrepancy to my peers and mentors to evaluate. I don't really have a clue, except to say my soldered-up assembly is going to be a really difficult to take apart, and the kit pull rods are too short to build something to match the drawing.
 

Richard Gawler

Western Thunderer
I have now assembled most of the brass parts for the tender so it seemed sensible to install the radio control equipment now, before I attach any more castings or small details. In case I want to make structural alterations to the model.

I posted a photo of the r/c equipment here:
The Heybridge Railway, 1889 to 1913

DSC_1036.jpg
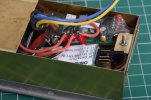
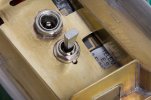
This is the general arrangement so don't anyone ever tell you "there is plenty of room in an 0 gauge tender". The front of the battery pack is visible beside the ferrite. To the right of the ferrite is the back of the charging socket and then the back of the toggle switch.

The ferrite fits into the space in front of the battery pack, so the footplate still fits flush against the body.

DSC_1039.jpg
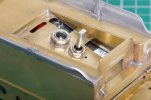
The toggle switch is closer to the power socket than I would really like but I did this to keep the body of the switch inside the body of the tender. The switch is a rather nice C&K one from my spares box, the switch provided in the r/c kit self-destructed after I unsoldered a wire from it.

The aerial is printed onto the pcb of the receiver.

r-c install.jpg
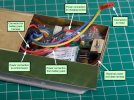
This is the arrangement of the wiring. I made three alterations to the wiring supplied in the r/c kit:
  • The ferrite is now about 20 mm closer to the control board
  • The 3-way harness connecting the controller to the receiver is about 25 mm shorter (I fitted a new Dupont connector so I didn't disturb the wiring on the controller)
  • The controller is now hard-wired to the switch and power socket.
If this lot ever has to come out, it should be possible to take out the receiver, undo the nuts holding the switch and power socket, and extract everything without unsoldering wires.

DSC_1046.jpg
The two brown wires here are a temporary connection to let me try out the tender with a tank loco, and they are protruding from this end of the tender because this end has a coupling hook.

This is the outer sideframe I moved a few days ago so it lines up with the wheels.

DSC_1043.jpg
The switch has three positions, 'charge', 'off' and 'run'. The 'off' position is functionally redundant (it's the same as 'charge' with no charger connected) but it's a nice-looking switch.

Edit:
Postscript - on a gloomy and rainy morning I have done a range trial and seen reliable operation over 45 metres in free space. This was as far as I could get whilst watching motor operation with 8x binoculars. I had both the transmitter and receiver about 1.2 metres above the ground for the trial. I am amazed, the receiver is (of course) enclosed by metal on all six sides with just the tiny slots to let the radio waves reach the aerial. One day I will get a helper and try to find the maximum range for reliable operation.
 
Last edited:

Richard Gawler

Western Thunderer
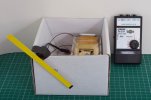
I have had another "field trip" with the radio equipment, this time supported by a helper, and completed a more conclusive range trial.

DSC_1059.jpg
This is the test setup. The tender (containing the radio receiver) stayed in this cardboard box for the trial.

The rotor connected to the motor was not a complete success:
  • Rotor visible = motor stopped
  • Rotor invisible = motor running; or rotor fallen off and motor stopped or running
However having a helper made this easy to fix.

We took the tender to a public footpath near the village of Fairstead in Essex. I chose this location because we know it well and I thought it would be electrically quiet. In fact it was so electrically quiet there wasn't any mobile phone coverage so we had to devise a sort of visual code using arms held up above our heads to communicate.

We held the tender and the transmitter about 1.2 metres above the ground. I carried the transmitter away from the model until control was lost, and then backed off a bit. Needless to say this sort of radio control equipment has an abrupt "digital cliff edge" and operation was reliable at a range of 125 paces and impossible at 130 paces. So I will say, the usable range is 120 paces. This is line of sight with no intermediate obstructions.

On the walk back to the car I measured out 60 paces between two landmarks I can see on the satellite imagery. Studying the Ordnance Survey imagery later suggests these landmarks are 53 metres apart. Converting the range from paces to metres I get ( 120 / 60 ) * 53 = 106 metres.

So I will say, the usable range is 100 metres. I think this is incredible for a receiver enclosed by a metal box on six sides with just a couple of little slots to let the radio waves reach the aerial. It is far more than I would need for any layout I can imagine.
 

Richard Gawler

Western Thunderer
View attachment 173045
Going back to the tender chassis . . . all of this kit is going together really well but the brake rigging especially seemed to fit like a dream.

View attachment 173047
The springing I have arranged on the middle axle works fine, but next time I would attach the vertical brass rod first and then file down the axle bush to fit. I think this would let me make a for a closer alignment between rod and bush. The spring is phosphor bronze wire, 0.5 mm diameter.

View attachment 173046
I have reinforced all of the brake rods with lengths of nickel silver wire on the inside to make the brake rigging more robust. I think this was worthwhile, the wire doesn't show from usual viewing angles but perhaps some flat strips would have been more elegant.

View attachment 173048
So - this is my first tender chassis:drool:

It is also my first model with nickel silver etchings . . . it runs really smoothly (and doesn't rock on its diagonal) and hopefully I can call it finished.

The space between the frames might be useful if I cannot squeeze all of the r/c equipment and its wiring into the body. The brass spacer near the letter C is adding some strength to the assembly but I could move this if I have to. I am very much making up the arrangement of the r/c install as I go along.

I like the overall appearance of the underframe, particularly the neat approach to hiding the springing of the centre axle. The etch parts for the brake pull rods suggest that the intended assembly ought to be for equalised brakes whereas what you have is pull through (with lost motion). Are there parts left over? Were all parts included on the etch?

regards, Graham

Well!!

I followed the kit instructions to build the brake rigging, and I have no parts left over.

Nevertheless, the GERS drawing L46, where I am now studying the brake rigging for the first time, shows similar cross-wise parts but a completely different arrangement of the pull rods.

View attachment 173054

I would like to leave this discrepancy to my peers and mentors to evaluate. I don't really have a clue, except to say my soldered-up assembly is going to be a really difficult to take apart, and the kit pull rods are too short to build something to match the drawing.

There is an obvious discrepacy here but I am struggling to move on from it. In particular, I have no way to confirm whether the drawing is correct for all tenders or for only specific batches. I am also extremely reluctant to alter my model to remove something which appears to be wrong now, only to make and fit something which turns out later to also be wrong.

The brake gear I have assembled will look reasonable when the model is on the track, but this entire model tender will always look unrealistic when picked up and viewed from underneath because the internal bearings are a convenience of the build and are not prototypical.

Therefore I think it would be best to accept what I have, and carry on with the tender and then begin the loco. A rebuild of the brake gear is a possible future project.
 

Richard Gawler

Western Thunderer
A fuse on the output from the Cobra controller will be necessary if I decide to use the controller to drive the track and not just the motor in the Y14.

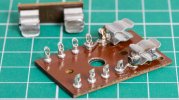
I haven't made up my mind yet on whether to go ahead and do this (see here) but all of the ready-made 20 mm fuse holders I can find are about 12 mm tall, too tall to fit into the tender chassis. So I have "made" a sort of low-profile fuse holder to go into the tender, to show myself the option is there.

DSC_1077.jpg
The fuse clips are from ready-made fuse holders, with their tags bent around the terminals on the tag board. The clips are made from a hard springy brass and I annealed the tags so I could bend them without snapping them off.

The clips can be had separately but typically in bags of a hundred at a time, and a handful of spare ready-made fuse holders is more likely to be useful to me in the future.

DSC_1075.jpg
The result, with sample fuse installed, will have about 2 mm clear space below the floor of the battery compartment in the body of the tender, so there is still room for a sheet of something insulating to go undeneath the tag board.

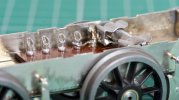
This photo shows how I was taught to solder electrical wires in the Spring of 1981. All strands are present, twisted to follow the lay of the wire, retained by solder, and individually visible under inspection. No excess solder and certainly no strands crossing over other strands. This job would still have been rejected by the Inspectors because I have wrapped the wires more than 180 degrees around the tags. I thought I was working for the finest manufacturing company in the World.

The other terminals are there to handle connections to pickups, to the loco and to a changeover switch.
 

Richard Gawler

Western Thunderer
DSC_1079.jpg
I am (a bit reluctantly) putting this model to one side for a while.

I haven't started the Y14 yet and I want to see it attached to the tender and running before I make any more changes to the control wiring; and any changes to the wiring need to happen before I attach much more detail to the tender.

DSC_1089.jpg
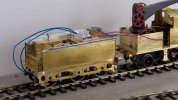
The tender is mostly done. The work remaining is the following:
  • Axlebox and spring detail - I have added these on one side but I'd like to find some third-party components to upgrade the overall appearance of the model if I can
  • Electrical pickups need to go on, if I decide to support conventional control from powered track
  • Front handrails - these will be tricky because I haven't left enough room to fix them beside the locker doors and making them detachable from the footplate will need some skill . . . I might just leave them off the model
  • Rear handrails, water filler and brake column should be straightforward, and buffer heads can wait until after painting

DSC_1082.jpg
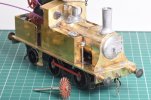
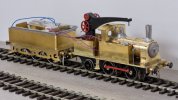
Nellie my crane tank has been invaluable in giving me some confidence in how well the radio control can work so I have given her a facelift.

DSC_1081.jpg
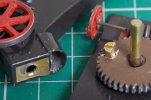
The crane jib swivels on a brass rod passing through two matching axle bushes. This seemed like a good idea at the time but the mechanism turns so freely the jib wanders out of alignment when running over any distance. So I have put a 6BA screw into the cast gear to hold the jib straight ahead. The screw can come out for photo sessions when I want to pose the jib.

DSC_1087.jpg
 
Last edited:
. . loco chassis construction

Richard Gawler

Western Thunderer
I have been working my way through the detailed essays on these locos written by Lyn D Brooks and published in the GER Society Journal in 1983, and I have come up with two lists of the subjects I need to tackle :)

References

Brooks, Lyn D, T. W. Wordsell's Class Y14 0-6-0 (LNER Class J-15), GERS Journal February 1983
Brooks, Lyn D, J. Holden's Class S23 2640 Gallon Locomotive Tender: Part One, GERS Journal October 1983
Brooks, Lyn D, J. Holden's Class S23 2640 Gallon Locomotive Tender: Part Two, GERS Journal October 1983
Gardner, J, GERS drawing no. L46 and supporting notes, S23 Standard Small Tender, GERS

Model of class Y14 locomotive
  • An example from one of batches R23, T23, Y23, U25 and Y25 (built 1889 to 1890)
  • An example from one of batches L28, N28, P28; or S28, X28 (built 1891 to 1892)
  • The locomotive is in its original condition (this seems fair for a 1890s setting), and so it is mostly unchanged from the original Wordsell batch of 1883, and has not, for example, been reboilered
  • This is a freight locomotive
The details I especially need to watch for are these. The letters in brackets ( ) are references used by Brooks
  1. Three-ring boiler with dome in the middle and feed clack immediately below (A) : modify kit boiler
  2. Flat grate (C) : cut new parts from brass
  3. Shallow cut-away frames (C) : modify kit frames

  1. Two- or three-ring boiler (A) or (B) : modify kit boiler as needed
  2. Sloping grate (D)
  3. Deep frames with oval cut-out (D)
  4. Low-sided cab with deep cut-outs (E) (high side design from 1899) : kit option
  5. No locomotive brake or train brake, hand brake on tender only : modify kit frames
  6. No steam heating (of course) : omit kit parts
  7. Lamp irons of the spike type pattern introduced by James Holden (M) (fitted 1886 onwards)
  8. Spherical brass blower valve, mounted on end of hand rail on side of smokebox (N) : check period photos
  9. Hollow handrail and control wheel at end of handrail, inside cab (N) : check period photos for thicker handrail
  10. Dished smokebox door (T) (heavier pattern on all locos after 1930) : seek help
  11. Built-up style smokebox with plain front (X) (flanged type from 1899) : seek help
  12. Parallel-cased buffers (c) : use Markits buffers (shallow bases)
  13. One Roscoe lubricator, usually but not always on right-hand side of smokebox (g) : check period photos
  14. Plain side rods (fluted from 1913) : use kit parts inside-out
  15. Chimney of GER pattern : kit option
  16. Shallow cab roof profile: kit option
  17. Ramsbottom safety valve : kit option
  18. Whistle on base of safety valve (part of the Ramsbottom design) : obtain or make brass whistle
  19. Black livery with lining, small G E R lettering on tender : check period photos
  20. The boiler band located at the front of the firebox goes around the boiler and not down the sides of the firebox : fill etched guide mark in kit boiler
Bonus feature 1: a Macallan blast-pipe, actuated by a crank on the left-hand side of the smoke box and a lever linking this back to the cab, was retro-fitted to these locomotives during the 1890s, so is a possible option (R) : omit for simplicity

Bonus feature 2: a short chimney, fitted to some locos for working on lines with a restricted loading gauge : check period photos

Model of S23 tender
  1. Asymmetric wheelbase, 5ft 6in + 6ft 6in : provided by design of kit
  2. Side frames with D-shaped slots : cut new parts from brass or nickel silver
  3. Narrow buffer beam (7ft 8in wide) : provided by design of kit
  4. Hand brake : provided by design of kit, but consider a brass replacement component
  5. Front footsteps mounted on the frames not a separate backing plate : provided by design of kit
  6. One or two toolboxes(*), placed directly on top of tank without wooden packing : provided by design of kit
  7. Holes in rear buffer beam left from removal of safety chains : drill buffer beam to suit
  8. No coal guards (1926 onwards): omit kit parts
  9. No water scoop (1897 onwards) : omit kit parts
  10. No rack for headcode discs (fitted from c.1904 onwards)
  11. No water gauge (fitted from c.1904 onwards)
  12. No partition for fire irons (fitted from 1906 onwards) : omit kit partition
(*) The John Gardner drawing of the tender (GERS drawing number L46) states, "toolbox both sides until c.1923 usually one only LNER" but Brooks suggests there could be one or two in GER times, and with no standardisation of which side or the orientation.

It's nice to see, many of these details are things the model won't have. My model will be simpler than one representing a loco in the 1960s.

Revisions

9 Oct 2022 : added cross-references to the lettered items in the source documents
9 Oct 2022 : added synopses of methods to incorporate these details into my model
7 Nov 2020 : decision made to model a locomotive with a sloping grate boiler, to provide option for 2- or 3-ring boiler
7 Nov 2020 : added item 20, the need to locate the boiler band in front of the firebox correctly

I will edit these lists as and when fresh details or corrections come to light.

I have settled on the design of the frames to build. This is thanks largely to the work of Lyn D Brooks in their article T. W. Wordsell's Class Y14 0-6-0 (LNER Class J-15), published in the Great Eastern Journal, October 1983.

Fundamentally, the GER introduced a sloping grate boiler for new Y14 locomotives in 1891 and built 30 locomotives. Later the same year they changed the design of the boiler and built another 20 locomotives. The Connoisseur kit gives me the frames for all of these locomotives, and the boiler for the last 20.

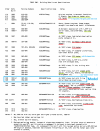
I can represent the earlier boiler by relocating the steam dome and clack valves to suit, but I am of course finding far more photographs of locos with the later boiler. The table attached is from the article by Brooks. I have used green lines to highlight features I want in my model and red lines to highlight features I want to avoid. I expect batches S28 and X28 are the ones I will try to represent.

I started to build the chassis yesterday and will post progress when I have something to show :)
 

Attachments

  • build variations markup 2.png
    build variations markup 2.png
    357.5 KB · Views: 2
Last edited:

Richard Gawler

Western Thunderer
The tender for the Y14 had its first decent test run yesterday, on the club test track. This run was in combination with Nellie my crane tank and six mainline coaches, and with banking assistance by "Polly". Polly is of the same provenance as Nellie (although she carries even more weight) and has returned recently from her trip to the top of Ben Nevis.

P1040719.jpg
The radio control system worked perfectly. I saw the red LEDs flashing on the transmitter for the a while, while Nellie was stalled. I do not know why. I will make a guess this is an overload indication but I really have no idea. The instructions for the Omni 2.0 state, "When the batteries in the handset get too low for reliable operation, both LED 1 and 2 start flashing together" but I saw the LEDs flashing "alternately", not "together"; and the batteries are fine.

I find the instructions for this control system difficult to understand however many times I read through them, and certainly impossible to memorise. As a result of this (and me having left them at home) the electronic speed controller stayed in its "shunt" speed profile all day. This was a bit of a pity, but then again my Y14 will be a freight loco. So maximum speed was a scale 15 mph throughout the day. I suspect I will never want to change the configuration of the receiver after I have set it up for the Y14.

The coaches are Darstaed Thompson ones fitted with roller bearings and they weigh most of 1 kg each (the brake composite is 995 g). Nellie weighs 567 g and the tender 395 g. Nellie started a train of four coaches without difficulty. She would also start a train of six on a straight and level track but needed banking assistance on the first curve and on the slightest rising gradient. I think this is quite a fair way to test the hauling capacity of a loco because using the r/c system removes any inadequacies of the electrical supply through the track.

My Y14 will have a Canon motor, Nellie has an unbranded motor. The Y14 will have space inside to add some lead weight but perhaps not as much as Nellie. So I would like to think, the Y14 will be able to haul the tender and a train of four coaches, quite possibly five. This is far more than I will need on my Heybridge railway but it will be nice to be able to take the loco to other people's layouts and put it in charge of a reasonable looking train. I would like to have all of my locos weighted so that they still spin their wheels rather than stall when a train proves too heavy for them. Then the motors should last longer :)
P1040720.jpg
The Hattons A4 was one of two present. Both A4s and the class 24 hauled the six coaches without difficulty.

I have an invitation to take the tender and Nellie to a garden railway. This line has tunnels lined with sheet zinc so we can find out whether the radio control will work in the tunnels.
 

Richard Gawler

Western Thunderer
I think this is a sound plan, it’ll protect DCC decoders too.

Yes it would.

This seems a good time to say, I want to steer clear of DCC for my own railway. I find the systems very "technical" in that the technology rather destroys the fun and doesn't enhance it. In particular, the fault-finding process can cause anxiety and distress, to an extent I am best to stay with analogue control and a multimeter. Of course the radio control system is highly technical but being dedicated to one loco does at least mean if it goes wrong, only one loco is out of use. I should probably add, I don't enjoy DCC sound and when I find myself near it all I want to do is turn it off.

When I build my layout I expect it will be large enough for one maybe two engines in steam. So if I can have radio control for visiting locomotives from the neighbouring GER (the Y14 and maybe an E4 using the same tender) then I can use analogue control for the second locomotive - this can be my Manning Wardle, my crane tank or future loco models. I can have all of the track live all of the time (as with a DCC layout) so there will be no section switches, and this will be nice because it gets rid of "driving the track".
 

simond

Western Thunderer
Ah, well, I quite like sound, but much of what is commercially available seems to me to be very wrong. In descending order of volume, I suspect safety valves, whistles, chimney with regulator wide open, drain cocks, normal chuffing. Track creaking and buffers clanging are certainly louder than shovelling, though probably rather less frequent. Injectors gurgle.

Trouble is that many recordings seem to have been made from “inside the cab”, which has an entirely different sound balance to ”hanging on the lineside fence”. The latter would surely be more appropriate.
 
Top