You are using an out of date browser. It may not display this or other websites correctly.
You should upgrade or use an alternative browser.
You should upgrade or use an alternative browser.
Brettell Road, 1960s black country (ish)
- Thread starter Jim S-W
- Start date

Osgood
Western Thunderer
Loadsaroom!how do you change the inside tyres? looks a bit tight in there!

Jim smith-wright
Western Thunderer
While at Scaleforum with Cades Green it was mentioned that Iain had a Lesney Weatherill Loader that he intended to do something with for the layout. Given my fascination with doing stuff with things from the toy-box this was pretty much an irresistible project to have a look at.
Weatherill Hydraulic
Weatherill were not a company I was aware of before now. F. E. Weatherill Limited was founded the late 1940s in North London before moving to Welwyn Garden City in the mid 50's. Mr F.E. Weatherill was formerly of another similar company Chaseside. Their machines were generally built around Ford components but later moved to Perkins and later still Leyland Engines. Chaseside used cable operation and F.E. Weatherill had tried to get Chaseside to look at the Hydraulic route for their machines but Chaseside weren't interested. The lineage from cable operation to hydraulic was somewhat apparent in the layout of the earlier Weatherill machines.
By the late 70s Weatherill were struggling, They could not match the prices of machines imported from Scandinavia, Japan and the USA. They met with the UK government to ask for protection of UK manufacturers but that plea fell on deaf ears. They downsized and closed the Welwyn Garden City factory, moving to Tottenham where the plan was to focus on smaller high lift two-wheel drive rigid loaders but they couldn't carve out a market for these and in the mid '80s the firm closed down.
Lesney
It seems strange then that Lesney would be all that interested in producing toys of Weatherill loaders but they produced 3 in total. A big factor in this could be that the Weatherill Factory and the Lesney factory were next door to each other! Of the 3 toys produced 2 were the same 2H loader. The difference being that the first was to 1:75 scale (the yellow one), and the second (the orange one) was larger, no doubt to fit the standard sized box. The third toy was a later design and part of the larger 'Superkings' range.
The Model

I've bashed quite a lot of toys into something a little more accurate over the years but I admit I had to look quite hard to see the potential in this one. In the end only the main body was usable with the cab and the diecast driver being cut away. It was painted in something that resisted all efforts to remove it including dunking it in cellulose thinners overnight!

So out with the microstrip mainly. The driving wheels were from a JCB kit and the front wheels from my box of things that might be useful one day, Paragon models I think. The shovel was knocked up from bits of brass using photos as a guide.

The finished result.

In its new home on Cades Green. It seemed quite popular with the Kids at the Uckfield Show this weekend.
Weatherill Hydraulic
Weatherill were not a company I was aware of before now. F. E. Weatherill Limited was founded the late 1940s in North London before moving to Welwyn Garden City in the mid 50's. Mr F.E. Weatherill was formerly of another similar company Chaseside. Their machines were generally built around Ford components but later moved to Perkins and later still Leyland Engines. Chaseside used cable operation and F.E. Weatherill had tried to get Chaseside to look at the Hydraulic route for their machines but Chaseside weren't interested. The lineage from cable operation to hydraulic was somewhat apparent in the layout of the earlier Weatherill machines.
By the late 70s Weatherill were struggling, They could not match the prices of machines imported from Scandinavia, Japan and the USA. They met with the UK government to ask for protection of UK manufacturers but that plea fell on deaf ears. They downsized and closed the Welwyn Garden City factory, moving to Tottenham where the plan was to focus on smaller high lift two-wheel drive rigid loaders but they couldn't carve out a market for these and in the mid '80s the firm closed down.
Lesney
It seems strange then that Lesney would be all that interested in producing toys of Weatherill loaders but they produced 3 in total. A big factor in this could be that the Weatherill Factory and the Lesney factory were next door to each other! Of the 3 toys produced 2 were the same 2H loader. The difference being that the first was to 1:75 scale (the yellow one), and the second (the orange one) was larger, no doubt to fit the standard sized box. The third toy was a later design and part of the larger 'Superkings' range.
The Model
I've bashed quite a lot of toys into something a little more accurate over the years but I admit I had to look quite hard to see the potential in this one. In the end only the main body was usable with the cab and the diecast driver being cut away. It was painted in something that resisted all efforts to remove it including dunking it in cellulose thinners overnight!
So out with the microstrip mainly. The driving wheels were from a JCB kit and the front wheels from my box of things that might be useful one day, Paragon models I think. The shovel was knocked up from bits of brass using photos as a guide.
The finished result.
In its new home on Cades Green. It seemed quite popular with the Kids at the Uckfield Show this weekend.
Jim smith-wright
Western Thunderer
The subject this time is this...

... the good old Mainline LMS BG. A great model for its time but not without room for a little bit of TLC. There is an error here that once you see it you cant un-see and that is that the underframe is too wide by 2mm. Ive talked in the past about looking at dimensional errors as a percentage. 2mm off over the width of a coach is a much larger percentage than 2mm over its length but theres an additional factor in play here and that is relationships. If the whole model was 2mm to wide you might (but probably wouldn't) get away with it but when only part of it is, it just looks weird. Let's be realistic here we are talking about 1mm per side but that 1mm means the edges of the solebar framing sticks out from the bottom of the body rather than tucking under it. Also the footsteps don't line up properly but thats a minor thing.
So the options then. You could just replace the underframe with a Comet one but at the time they were out of stock and the trussing is a flat etch so no real improvement over the one already there. Or you could slice 2mm out of the centre of the floor and glue it back together. The issue with this is I don't think the trussing itself is over width. To me the simplest solution was to make a new floor from plasticard (29.5mm x 196mm) and transplant the trussing from the mainline model. The new solebars are 4mm channel from evergreen.

So heres the model had already done on its new underframe. The bogies are Brassmasters with the original sideframes attached. Buffers have been replaced with more accurate ones from Lanarkshire models.

As is usually the way for me I got a little carried away. Why build one new floor when you can build several? Theres a few subtle differences here such as the roof vents and footsteps.

As with any grouping of things there tends to be one member thats a little bit weirder than the others and this is it. The diagram 1715 version. OK it looks kind of the same but the qay it was build was quite different and actually much more like the much later BR Mk2 in that the body was where all the strength is and it didn't need a traditional underframe. The solebars themselves are also different in that the outer face is solid. Other variations are the positioning of the roof vents, bodyside beading (which comes in a whole load of variations on these coaches anyway), the extra rain strips and the full length footboards

This is the more normal side. Note the dynamo is at the opposite end to the more standard versions.

The other side is decidedly more odd with basically next to nothing there. It almost looks like the model hasn't been finished. Note also the steps on the bogie.
Just a quick note to thank Mark Tatlow and Graham Speechley for their help locating images of the diagram 1715 version.
... the good old Mainline LMS BG. A great model for its time but not without room for a little bit of TLC. There is an error here that once you see it you cant un-see and that is that the underframe is too wide by 2mm. Ive talked in the past about looking at dimensional errors as a percentage. 2mm off over the width of a coach is a much larger percentage than 2mm over its length but theres an additional factor in play here and that is relationships. If the whole model was 2mm to wide you might (but probably wouldn't) get away with it but when only part of it is, it just looks weird. Let's be realistic here we are talking about 1mm per side but that 1mm means the edges of the solebar framing sticks out from the bottom of the body rather than tucking under it. Also the footsteps don't line up properly but thats a minor thing.
So the options then. You could just replace the underframe with a Comet one but at the time they were out of stock and the trussing is a flat etch so no real improvement over the one already there. Or you could slice 2mm out of the centre of the floor and glue it back together. The issue with this is I don't think the trussing itself is over width. To me the simplest solution was to make a new floor from plasticard (29.5mm x 196mm) and transplant the trussing from the mainline model. The new solebars are 4mm channel from evergreen.
So heres the model had already done on its new underframe. The bogies are Brassmasters with the original sideframes attached. Buffers have been replaced with more accurate ones from Lanarkshire models.
As is usually the way for me I got a little carried away. Why build one new floor when you can build several? Theres a few subtle differences here such as the roof vents and footsteps.
As with any grouping of things there tends to be one member thats a little bit weirder than the others and this is it. The diagram 1715 version. OK it looks kind of the same but the qay it was build was quite different and actually much more like the much later BR Mk2 in that the body was where all the strength is and it didn't need a traditional underframe. The solebars themselves are also different in that the outer face is solid. Other variations are the positioning of the roof vents, bodyside beading (which comes in a whole load of variations on these coaches anyway), the extra rain strips and the full length footboards
This is the more normal side. Note the dynamo is at the opposite end to the more standard versions.
The other side is decidedly more odd with basically next to nothing there. It almost looks like the model hasn't been finished. Note also the steps on the bogie.
Just a quick note to thank Mark Tatlow and Graham Speechley for their help locating images of the diagram 1715 version.
Jim smith-wright
Western Thunderer
Just one of those every day, run of the mill style posts this time but with a few little tweaks to appease the wagon buffs.

Starting with the Parkside kit for the LNER 21t riveted coal hopper. Built pretty much as instructed but I did change the side stanchion plates for 10 thou plasticard as the ones in the kit were a bit chunky.

The spare brakes that came with the above kit were used to correct the brakes on my prototype 24.5t hopper I've featured before.

The humble D2150 13t open from the Parkside kit. The only real visual difference between these and the BR build is the small lip on the ends. A bit of 10x20 thou mictrostrip sorted that.

Ex LNER Diagram 210 adapted from the parkside kit for the Dia 1/120 wagon. The side stanchion were slightly reshaped as were the buffer beams while the chassis was replaced with spares from my scrap box.

Another bog standard affair, the D2039 ex LMS 12t van. This one was built from the Ratio kit with the addiction of the Rumney Models LMS van detailing etch (B105). It features the 3 part end for a super subtle bit of variety.

Finally something a little more involved. Before and after of the sides for a D2103 12t van using the parkside fruit van as a start point. The ends were scratchbuilt.

Starting with the Parkside kit for the LNER 21t riveted coal hopper. Built pretty much as instructed but I did change the side stanchion plates for 10 thou plasticard as the ones in the kit were a bit chunky.
The spare brakes that came with the above kit were used to correct the brakes on my prototype 24.5t hopper I've featured before.
The humble D2150 13t open from the Parkside kit. The only real visual difference between these and the BR build is the small lip on the ends. A bit of 10x20 thou mictrostrip sorted that.
Ex LNER Diagram 210 adapted from the parkside kit for the Dia 1/120 wagon. The side stanchion were slightly reshaped as were the buffer beams while the chassis was replaced with spares from my scrap box.
Another bog standard affair, the D2039 ex LMS 12t van. This one was built from the Ratio kit with the addiction of the Rumney Models LMS van detailing etch (B105). It features the 3 part end for a super subtle bit of variety.
Finally something a little more involved. Before and after of the sides for a D2103 12t van using the parkside fruit van as a start point. The ends were scratchbuilt.
Jim smith-wright
Western Thunderer
As a follow on to the last post - more every-day wagons have rolled off the workbench. This time it's a quartet of shock wagons.

Starting with the basics - Diagram 1/040 shock open from the Parkside kit. Built pretty much as supplied with the addition of a Rumney Models tarpaulin bar and a sheet from my now standard black latex glove.

Next ex LMS diagram 1983 from the same kit as above with the additional top lip on the ends and buffers from Lanarkshire models. You cant see it in the pic but I replaced the floor with scribed lead sheet.

A smidge more involved is this Diagram 1/038 shock open from the parkside kit for the standard (not shock) wagon. I shortened the sides by cutting sections out next to the middle section and mounted them on a new floor as the prototype wagons had a visible lip around the bottom.

Finally a diagram 1/219 shock palvan. A bit more involved again as I could use spare ends and a roof from Parkside standard 12t vans but the sides needed to be made from scratch. The chassis is the Red Panda kit.
Starting with the basics - Diagram 1/040 shock open from the Parkside kit. Built pretty much as supplied with the addition of a Rumney Models tarpaulin bar and a sheet from my now standard black latex glove.
Next ex LMS diagram 1983 from the same kit as above with the additional top lip on the ends and buffers from Lanarkshire models. You cant see it in the pic but I replaced the floor with scribed lead sheet.
A smidge more involved is this Diagram 1/038 shock open from the parkside kit for the standard (not shock) wagon. I shortened the sides by cutting sections out next to the middle section and mounted them on a new floor as the prototype wagons had a visible lip around the bottom.
Finally a diagram 1/219 shock palvan. A bit more involved again as I could use spare ends and a roof from Parkside standard 12t vans but the sides needed to be made from scratch. The chassis is the Red Panda kit.
Jordan
Mid-Western Thunderer
Sheer genius!!tarpaulin bar and a sheet from my now standard black latex glove


Jim smith-wright
Western Thunderer
Hi Jim, dare I ask where you buy your black latex gloves?? Looks convincing. Are they actually latex or the latex free nitrile ones?
That's not something I'd paid attention to before you asked. Turns out they are nitrile and are a brand called supertouch. I think I got them from eBay but I've had this box since before COVID. I think tattoo artists seem to prefer the black ones over the more medical looking ones.
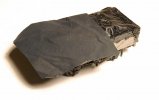
These are powder free and have a different sheen on either side of the material. I use the glossy side and varnish it with clear as the layout is set in the rain but see the attached image for how the matt side looks
Attachments
Jim smith-wright
Western Thunderer
Osgood
Western Thunderer
If you were to get a tattoo (maybe a Pannier?) you could ask the tattoo artist for the gloves when finished, and get them for free.That was going to be my next question...
")
Phil O
Western Thunderer
a Tattoo is much smaller than a Pannier, and has a saddle tank.
It should be a saddle tank across his chest and a pannier across his back.
Jim smith-wright
Western Thunderer
Erm rightIf you were to get a tattoo (maybe a Pannier?) you could ask the tattoo artist for the gloves when finished, and get them for free.
Do you want me to fetch the nurse?
adrian
Flying Squad
Sorry but a "real" modeller would have a scale rule tattooed on their forearmIt should be a saddle tank across his chest and a pannier across his back.

Although make sure you have it tattooed a scale distance from your finger tip!!