Lyndhurstman

Western Thunderer
Wheel meet again
IMG_1560.jpeg
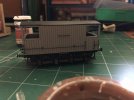
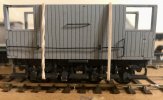
Upright and sat down. After many tribulations over the past few evenings, we have a rolling chassis.
It had got to this state earlier in the week, but one of the interior axles was skidding, rather then turning. So it came apart again and had some hacking and filing applied. Although the biggest problem was that I’d failed to notice that one of the waisted pinpoint bearings had settled in skewed, and the cup of another one wasn’t machined out to a proper accommodation (subsequent checking seems to confirm that this one came from a batch of Markits bearings, whereas the other seven were Gibsons; I can only presume that Stores had a catalogue issue in times past, and allowed some mixing of manufacturers. A memo had been raised to try to rectify procedures.)

Still, now it runs smoothly. Uncompensated. I did toy with fitting a pair of MJT internal rocking unit on a pair of axles, but there really isn’t enough room between the solebars to get free movement.

With the glue drying, and the sun finally shining, here seems to be a good point for me to acknowledge the considerable help I have had from Tad, the designer of this kit. He’s provided numerous iterations to me in our joint pursuit of applying P4-ability to this kit. And given me a lot of knowledge and history about the various methods of manufacturing and development of substrates. It’s been (is being; let’s not get ahead of ourselves…) an education. I greatly appreciate his support, and willingness to help overcome my pernicketiness.

Cheers

Jan
 

jonte

Western Thunderer
Wheel meet again
View attachment 213380
Upright and sat down. After many tribulations over the past few evenings, we have a rolling chassis.
It had got to this state earlier in the week, but one of the interior axles was skidding, rather then turning. So it came apart again and had some hacking and filing applied. Although the biggest problem was that I’d failed to notice that one of the waisted pinpoint bearings had settled in skewed, and the cup of another one wasn’t machined out to a proper accommodation (subsequent checking seems to confirm that this one came from a batch of Markits bearings, whereas the other seven were Gibsons; I can only presume that Stores had a catalogue issue in times past, and allowed some mixing of manufacturers. A memo had been raised to try to rectify procedures.)

Still, now it runs smoothly. Uncompensated. I did toy with fitting a pair of MJT internal rocking unit on a pair of axles, but there really isn’t enough room between the solebars to get free movement.

With the glue drying, and the sun finally shining, here seems to be a good point for me to acknowledge the considerable help I have had from Tad, the designer of this kit. He’s provided numerous iterations to me in our joint pursuit of applying P4-ability to this kit. And given me a lot of knowledge and history about the various methods of manufacturing and development of substrates. It’s been (is being; let’s not get ahead of ourselves…) an education. I greatly appreciate his support, and willingness to help overcome my pernicketiness.

Cheers

Jan

I’m pleased that your perseverance (nay, trial and tribulation ;) ) has paid off, Jan, and with valuable assistance as mentioned, appears overall to have been an enjoyable experience.

Here’s to the next!

Jon
 

Lyndhurstman

Western Thunderer
I’m pleased that your perseverance (nay, trial and tribulation ;) ) has paid off, Jan, and with valuable assistance as mentioned, appears overall to have been an enjoyable experience.
Here’s to the next!

Jon
Thanks Jon,
As every, your support is gratefully acknowledged. As are all those who’ve stumbled upon this elongated therapy session.

I think my enjoyment comes in triumphing despite. We all have a variety of drains, scrapes, and wounds delivered unto us, and the restorative - and escapist - nature of a hobby is a definite boon, for me.

Thanks again

Cheers

Jan
 

Lyndhurstman

Western Thunderer
Curve Balls
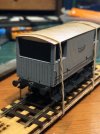
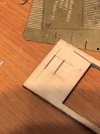
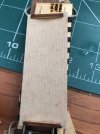
I’m adding the roof onto the GNR Brake. I tried the usual dodge pouring boiling water on plasticard stuck to a bottle of suitable curvature, but it didn’t convince. So I had an epiphany, and dug out the sheet of scalemodelscenery lasercut wagon floorboards. Just the business.
IMG_1610.jpeg
The only Faff was making the end roof support stay in place; the kit has it butting up against the pillars, and butt joints are never much cop, in my opinion. So I made a plasticard spacer to sit beneath it, and sellotaped both to inside of the veranda.
IMG_1606.jpeg
This allowed me to place Gorilla Glue contact adhesive on the inside of the roof, and place it on the end, holding it down with a elastic band contrivance.
IMG_1607.jpeg
I did one at a time, to make sure the roof sat properly. Once it’s all dried off, I’ll give it a paint, and fit the chimney and vent before sticking it down again.
IMG_1612.jpeg

Cheers

Jan
 

Lyndhurstman

Western Thunderer
Shame you're not modelling the interior, the ceiling would now look spot on!
Thanks, Dave.
I did think about putting some generic things in there, but you really can’t see anything, and the space is comprised by the thickness of the walls, anyway. But there’s always the verandah roof to bear witness (or whiteness; i presume that would be the colour of choice… #shrugsinignorance :) )

Cheers

Jan
 

Lyndhurstman

Western Thunderer
Last Knockings: Part 1
IMG_1619.jpeg

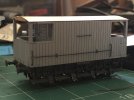
Today we celebrate light at the end of a twin bore tunnel.

In the Grown Up World, Argyle are safe for another year. In Tiny Train World we’re coming (we fervently hope) to The End, Brake van-wise.

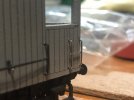
This week, I realised that there was a modification carried out on these vans, with two conjoined handrails at one end. This necessitated a jig, and some 0.45 NS wire.
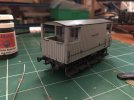
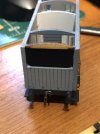
Today, with my mind 16 miles away, I did some simple stuff; adding the straight rain strips to each corner, and applying some paint.
IMG_1631.jpeg
IMG_1632.jpeg
All that’s left to do now is order the lamp irons from PHDesigns - I have to get some folding stuff together for that - add the side lamps at the roof level, and numbering.

Cheers

Jan
 

Lyndhurstman

Western Thunderer
Congrats on both counts, Jan :thumbs:

Jon
As ever, thank you Jon
There are seemingly very few pictures of these beasts in service; they were built for the London coal trains, and people never seemed to focus on the back for some reason. Steve Banks made one from the D&S kit (I’ve seen them go for around 50 quid on eBay), and the double handrails only came to light fairly recently, when a grainy photo popped up on RMWeb. I used the spare ‘fret’ of the kit as a jig.
IMG_1615.jpeg
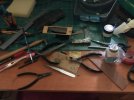
… and this is the havoc making a pair of these did to my tidy workbench…
IMG_1621.jpeg
… as for Argyle… well, let’s just acknowledge that being a fan of anything is one delightfully weird aspect of being human. Or at least this human! It probably has something to do with our belief that we’re associated with success and achievement. So it happens rarely for The Green Army :D

Cheers

Jan
 
Last edited:

jonte

Western Thunderer
As ever, thank you Jon
There are seemingly very few pictures of these beasts in service; they were built for the London coal trains, and people never seemed to focus on the back for some reason. Steve Banks made one from the D&S kit (I’ve seen them go for around 50 quid on eBay), and the double handrails only came to light fairly recently, when a grainy photo popped up on RMWeb. I used the spare ‘fret’ of the kit as a jig.
View attachment 214709
… and this is the havoc making a pair of these did to my tidy workbench…
View attachment 214710
… as for Argyle… well, let’s just acknowledge that being a fan of anything is one delightfully weird aspect of being human. Or at least this human! It probably has something to do with our belief that we’re associated with success and achievement. So it happens rarely for The Green Army :D

Cheers

Jan

Well done with the perseverance on your search for fidelity; good to see a spare piece of fret put to good use too :thumbs:

I still keep the odd piece of waste in store for a rainy day, although sadly the opportunity seldom arises….

As for being a fan, we’re on the same page, Jan. As an Evertonian, I often wonder why I put myself through it. I’m reliably informed were ‘born to be’ :rolleyes:

Keep on keeping on.

Jon
 

Lyndhurstman

Western Thunderer
Shanks for everything
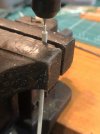
Buffer housings and location. The GNR buffer bodies were ornate ribbed affairs, and after a fruitless search, the designer of the kit generously ran off an interpretive foursome for me. I tried to make them sprung, but to was too much for me at the moment; dealing with multiple miniature bores of Albion Alloy tube and the associated Ping Factor were primary stumbling blocks… So I’ve gone with making a mounting boss-cum-depth stop out of two diameters of Plastruct tube and rod. And drilling the 0.45mm hole by hand. (I tried the Unimat, but I was too a-feared of breaking the drill….)
IMG_1644.jpeg
IMG_1645.jpeg
The larger diameter will sit in the existing hole in the bufferbeam. One down, three to go…

Cheers

Jan
 
Top